Purchasing an SSL Certificate for White Label (GoDaddy)
This guide provides step-by-step instructions for purchasing and installing an SSL certificate with GoDaddy to enable a custom domain for your white-label customer login page on Convirza's servers.
Prerequisites
- White Label Setup: If you haven’t configured your white-label service yet, follow the White Label Setup Guide before proceeding.
- Domain Ownership: Ensure you own the domain where the SSL will be applied.
Step 1: Select a Subdomain
You need to choose a subdomain where your login page will be hosted. Examples include:
- calls.yourdomain.com
- calltracking.yourdomain.com
Important: Purchase the SSL for the specific subdomain (e.g., calls.yourdomain.com) and not the top-level domain (yourdomain.com).
Step 2: Create a CNAME Record
To route traffic correctly, configure a CNAME record in GoDaddy:
- Log in to GoDaddy and navigate to DNS Management for your domain.
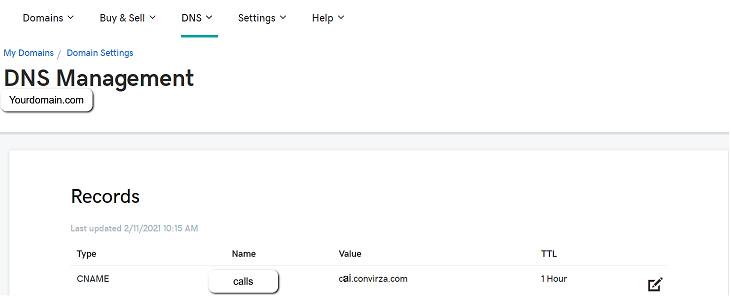
- Create a new DNS Record with the following details:
- Type: CNAME
- Name: Enter the subdomain (e.g., calls) without the full domain name.
- Value: Enter cai.convirza.com.
- TTL: Set to 1 hour.
- Save the record.
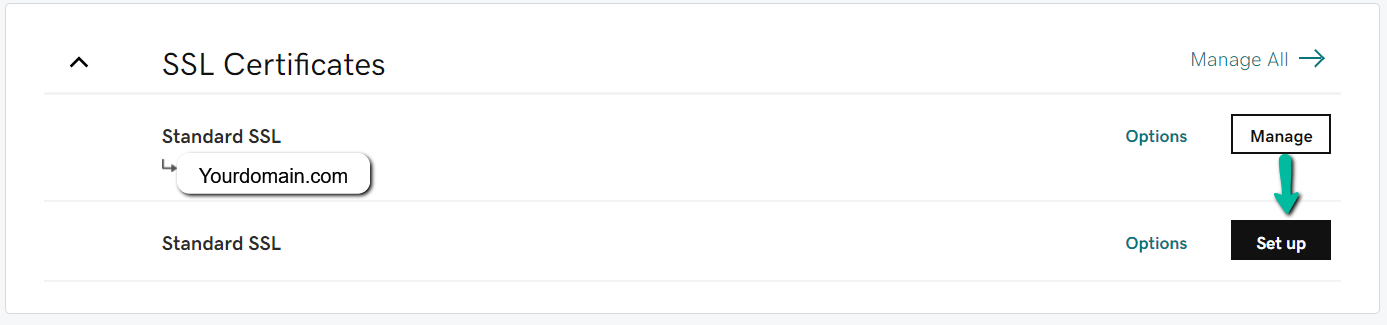
Step 3: Purchase and Configure the SSL Certificate
- Purchase a Standard SSL Certificate through GoDaddy.
- Click on Setup after purchase.
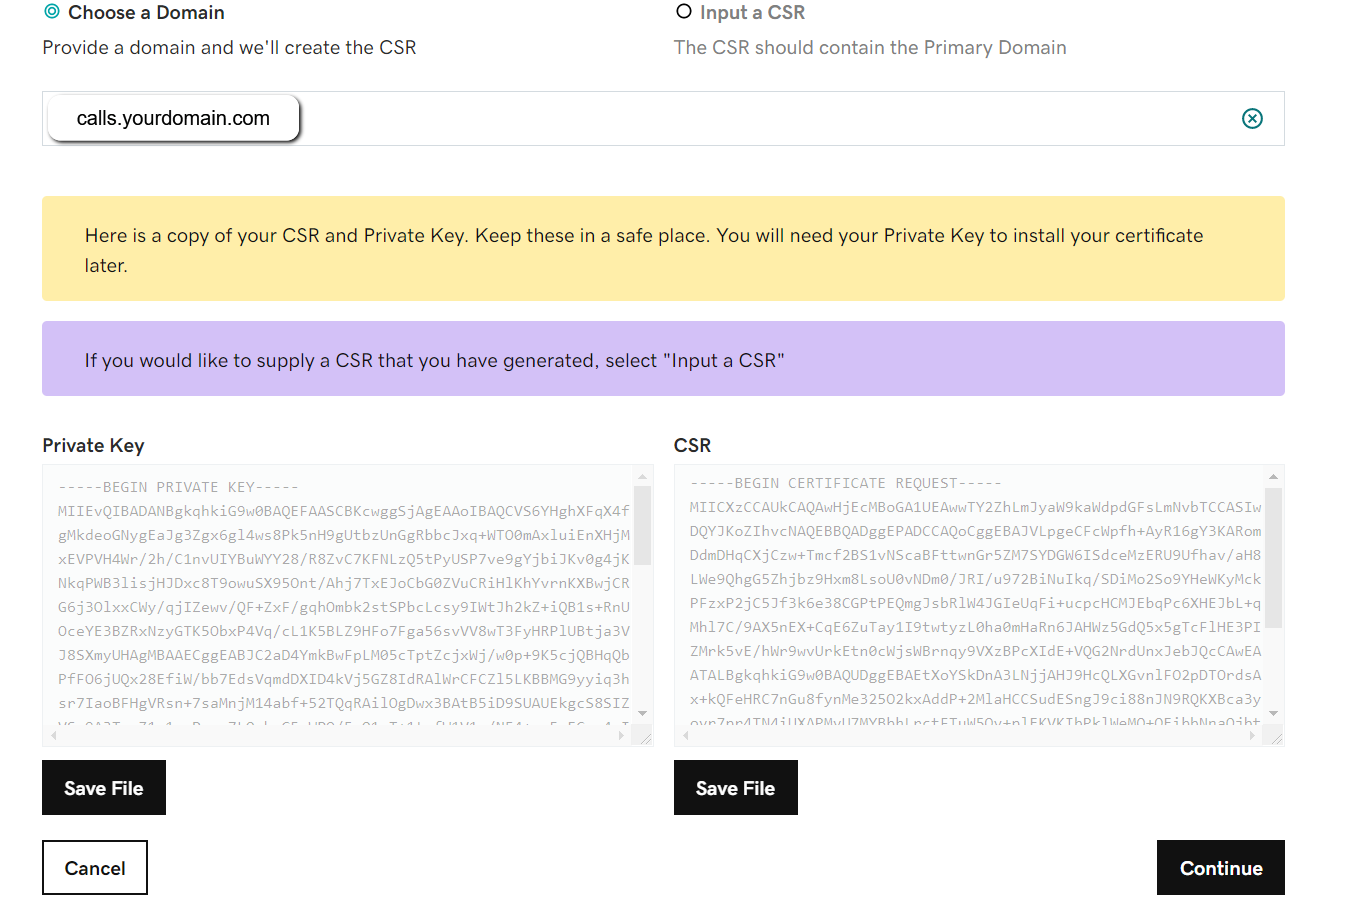
- Enter the subdomain (e.g., calls.yourdomain.com) where the SSL will apply.
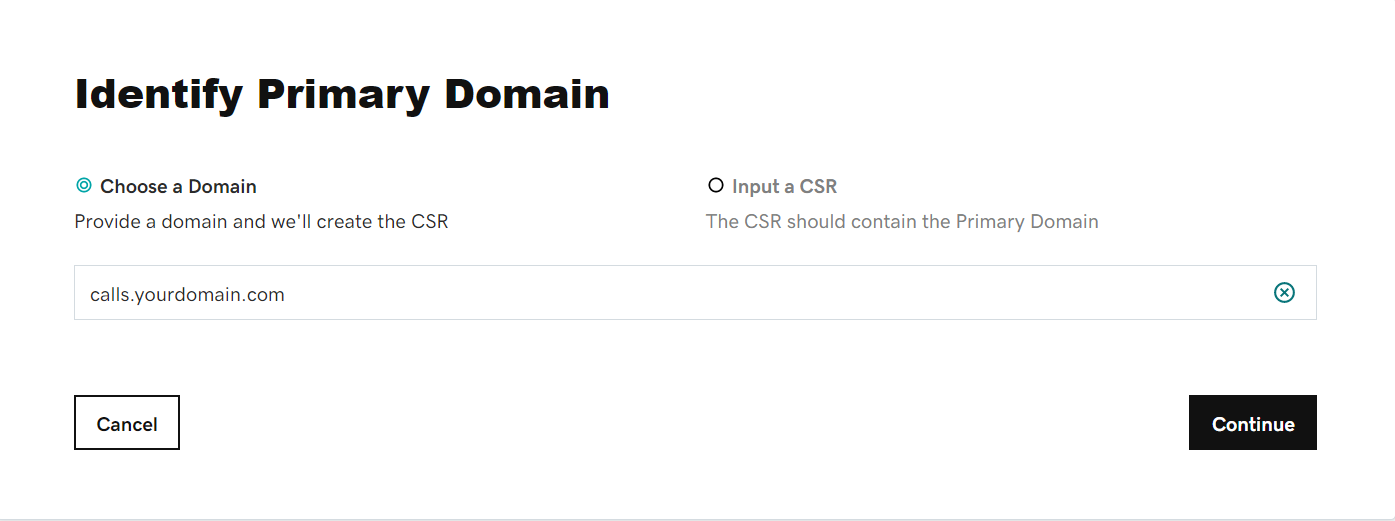
Step 4: Verify Your Domain
- After setup, your domain will be in a Pending Verification state.
- GoDaddy will send you an email for domain verification. Complete the process as instructed in the email.

Step 5: Download and Prepare the SSL Certificate
- Once verified, download the SSL certificate ZIP file from GoDaddy.
- Extract the ZIP file to a folder on your desktop.

- Locate the .crt files inside the extracted folder:
- Move the .crt file without "bundle" in its name to a new folder named after your subdomain (e.g., calls.yourdomain.com).
Step 6: Add the Private Key
- Locate the private key file you downloaded earlier during the SSL setup process.
- Move this file into the same folder (calls.yourdomain.com) that contains the .crt file.
Your folder should now contain:
- Private Key File
- SSL Certificate (.crt File)
- Right-click the folder and select Send To > Compressed (Zipped) Folder.
Step 7: Submit to Convirza Support
- Send an email to support@convirza.com with the subject line:
SSL Certificate for calls.yourdomain.com - Attach the zipped folder created in the previous step.
Step 8: SSL Installation
- Once received, Convirza will install your SSL certificate on their servers within 2 business days.
- You will receive a confirmation email when the installation is complete.
Completion
After the SSL installation is confirmed:
- Your white-label login page will be fully functional.
- The subdomain (calls.yourdomain.com) will be secured and active.
For additional support, contact Convirza Support at support@convirza.com.
This article is structured for easy navigation, ensuring clarity and providing actionable steps for a smooth SSL setup. Let me know if you'd like to include screenshots or further refinements!