Part 1: Setting Up the Webhook
Steps to Configure a Webhook
- Log In to Your Convirza Account:
Navigate to Settings → Customization → Webhook.
Create a New Webhook:
Click the Create button. - Fill Out the Required Fields
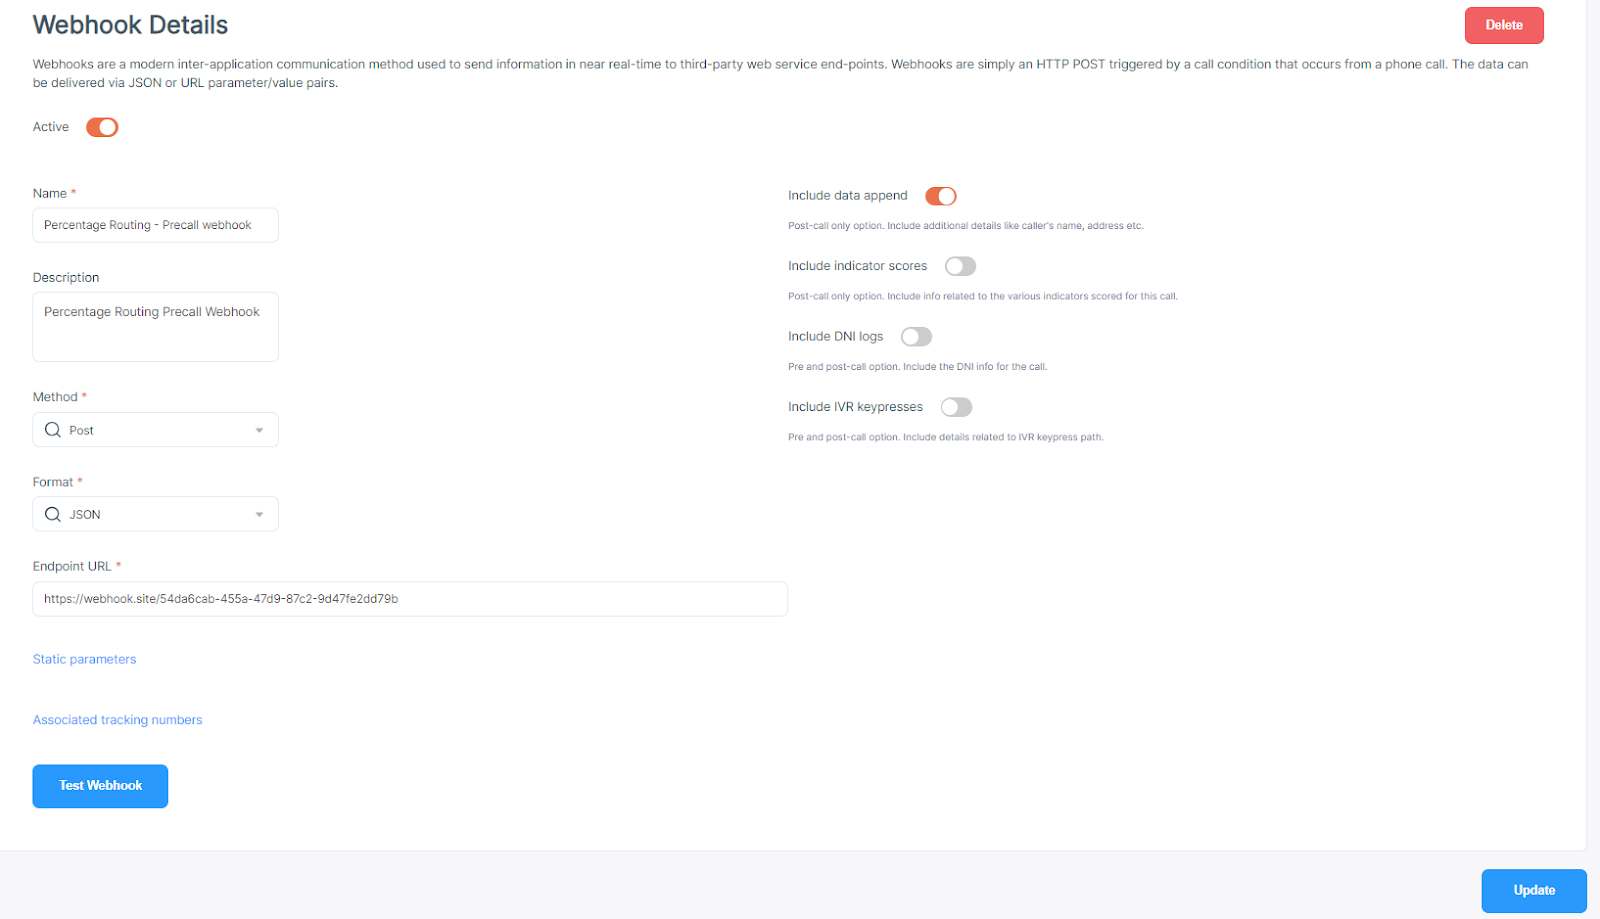
Endpoint URL: Enter the URL where the call data will be sent.
(Example: Use a test endpoint for testing, such as those available by searching "webhook test site" on Google). - Test Your Webhook:
Click Test Webhook to verify functionality. Data should be received at your endpoint within seconds. - Add Static Parameters (Optional):
If your endpoint requires basic authentication or custom payloads, fill in the Field Name and Static Value fields. - View Associated Tracking Numbers:
Webhooks can inherit numbers from parent groups if added at the top or second level. Numbers and number pools linked to the webhook are listed under the Associated Tracking Numbers tabs.
Part 2: Adding the Webhook to Tracking Numbers
Overview
Webhooks must be added to tracking numbers for data transmission. There are two types of webhooks:
- Post-Call Webhooks: Triggered after call completion.
- Pre-Call Webhooks: Triggered at the start of a call.
Post-call webhooks are triggered immediately after a call is completed and can be configured to activate only when specific conditions are met. These webhooks can include additional data such as the caller's name and address, indicator scores (if you utilize Conversation Analytics), and DNI logs (if you're using DNI). You can easily include these data points by checking the appropriate boxes in the screenshot provided.
On the other hand, pre-call webhooks are activated at the start of a call and are sent for all calls. You can also include DNI logs by selecting the option to ‘Include DNI logs’ in the screenshot.
While post-call webhooks can transmit more data points, pre-call webhooks have the advantage of being sent as soon as a call connects. This can be particularly useful if you want to identify which campaign a caller is being referred from right at the beginning of the call.
Post Call Webhooks
Post-call webhooks are ideal for detailed data transmission, including caller details, indicator scores, and DNI logs.
Steps to Add a Post-Call Webhook:
- Navigate to the Tracking Number Settings:
- Go to Reports → Tracking Number Settings.
- Click the link under the TN Name column.
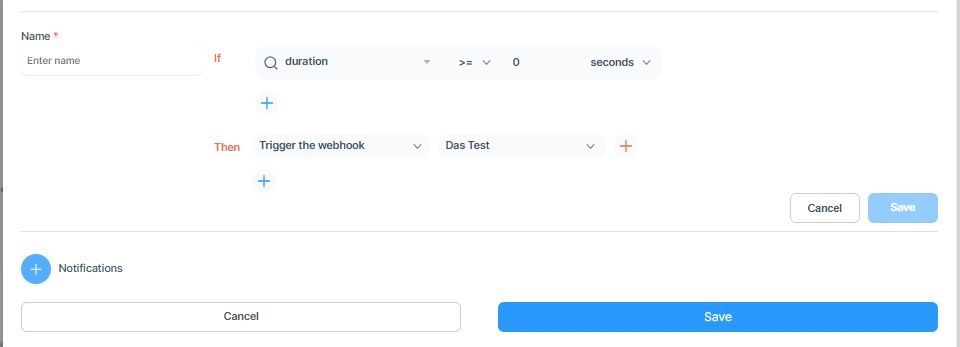
- Access Conversation Actions:
- Click the Notification button.
- Set Conditions:
- Choose a condition for triggering the webhook (e.g., "All calls over 0 seconds").
- Select the Webhook:
- In the Trigger Webhook action, select the webhook you created.
- Save Changes:
- Click Save to finalize the configuration.
Pre Call Webhooks
Pre-call webhooks provide immediate data transmission as soon as the call connects. They are ideal for identifying campaigns at call start.
Steps to Add a Pre-Call Webhook:
- Navigate to the Tracking Number Settings:
- Go to Reports → Tracking Number Settings.
- Click the link under the TN Name column.
- Expand Advanced Tracking Number Settings:
- Click the plus symbol to expand settings.
- Enable Pre-Call Webhook:
- Check the box for Pre-call webhook.
- Select an existing webhook from the dropdown or click Create to set up a new one.
- Save Changes:
- Click Save to apply the configuration.
Key Considerations
- Post-Call Webhooks:
- Provide more data points such as caller name, address, and DNI logs.
- Best for in-depth post-call analysis.
- Pre-Call Webhooks:
- Send data as soon as the call connects.
- Useful for identifying the referring campaign at call initiation.