Under the Group Settings option, you can add the settings for the following pages.
Table of Contents
Click to quickly access specific sections
General:
To navigate to this page, Click on Settings→Group settings→General.
The 'General' tab enables you to configure the group's settings. Entering the group name, Default Login page and industry is mandatory.

You can choose your default login page from the available options: Dashboard, Conversations, or specific reports listed in the drop-down menu. Additionally, you can select the Default Scorecard, adjust the Spam Guard protection level, and configure the share DNI settings for the selected group displayed in the breadcrumb.
The 'Conversation Details' view can be set to either Default or Detailed. Similarly, the 'Conversation Scoring' view can be configured as either Default or Coaching. By default, these settings will apply to all users in the account. Users have the option to keep these settings as they are or change them according to their preferences.
The language detection toggle is enabled by default for the account and is always configured at the top-level group. When activated at the top level, it applies to the entire account. Consequently, features such as Summary, Transcription, and Scoring will be displayed in the language of the conversation (e.g., Spanish for Spanish conversations).
Please note that when navigating to the Conversation Details page from the Conversations or Conversation Scoring sections, if the language detection toggle is enabled, the detected language will be displayed on the page. A language filter will also be available in the Conversations or Conversation Scoring sections. If language detection is not enabled, the filter will remain hidden.
Notifications:
Notifications are activated based on specific triggers. For instance, if the duration is greater than 0 (trigger), an email alert will be sent to test@convirza.com (action). Various options for triggers and actions are available in CAI, allowing for different combinations to be implemented.
To reach this page, Click on Settings→Group settings→Notifications.
On this page, you can add the Notifications for the selected group in the breadcrumb. You also have the option to download the grid.

This page displays the grid containing information about Notifications. You can create new Notifications, manage their visibility, and set default settings. By default, the Following Notifications are included in the top-level group.
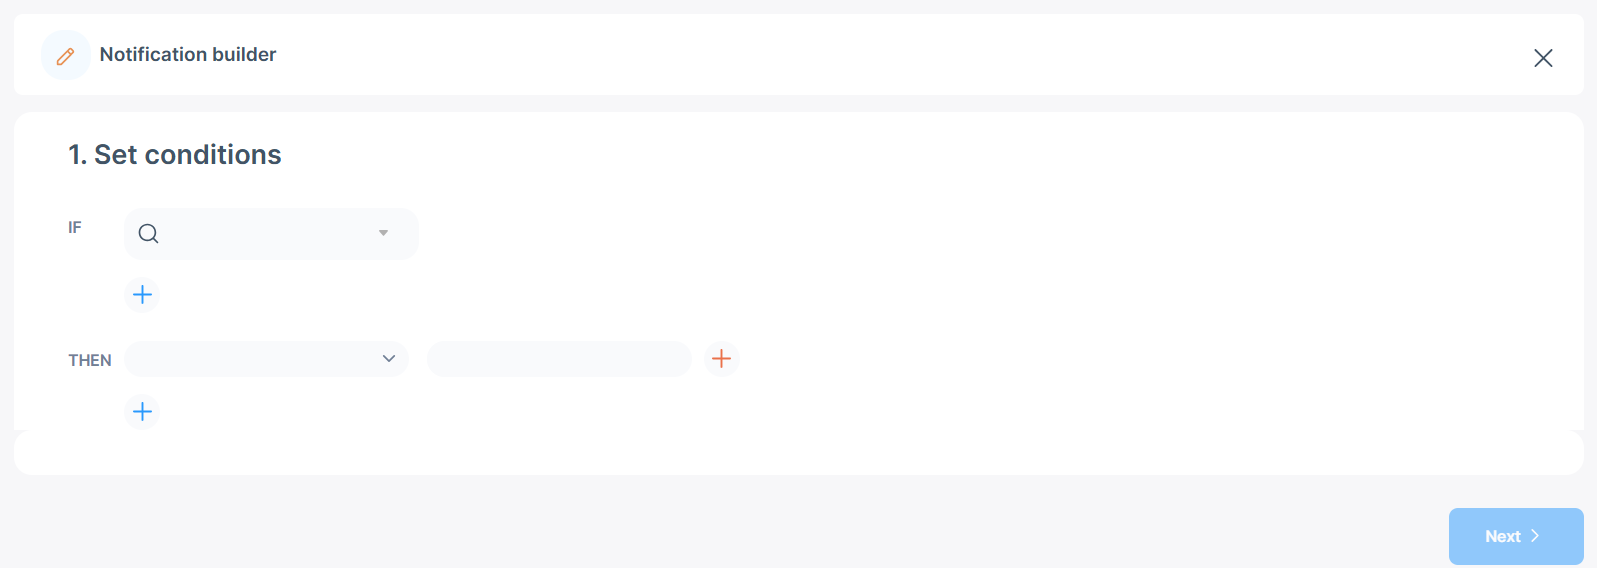
To create the new Notifications, click the create button to open the window. Add the trigger and action, then click save.
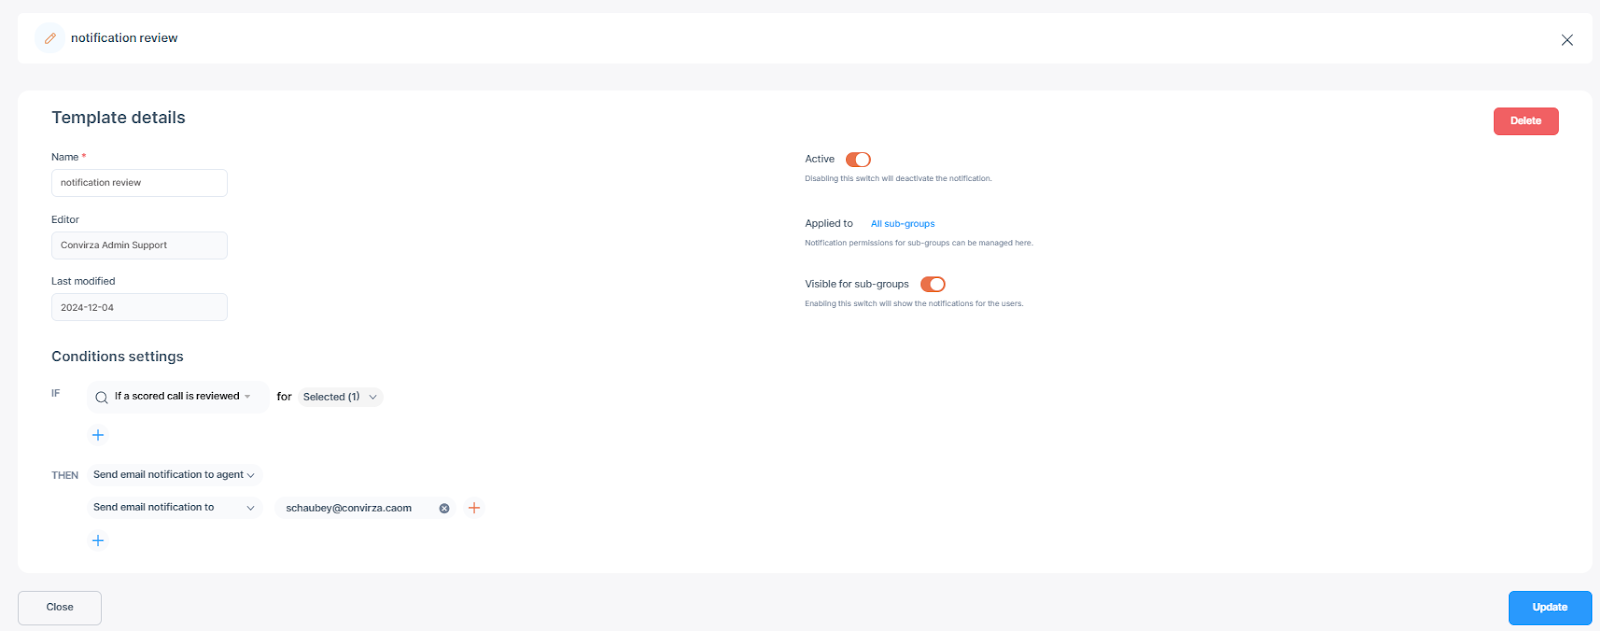
To edit a Conversation action, click on the row corresponding to the specific action you want to modify and update the relevant information. The Conversation action will apply to the groups selected under "Applied To." Notifications will be displayed for the sub-groups if the "Visible for Subgroups" toggle is enabled. You also have the option to delete the Conversation action from this interface.
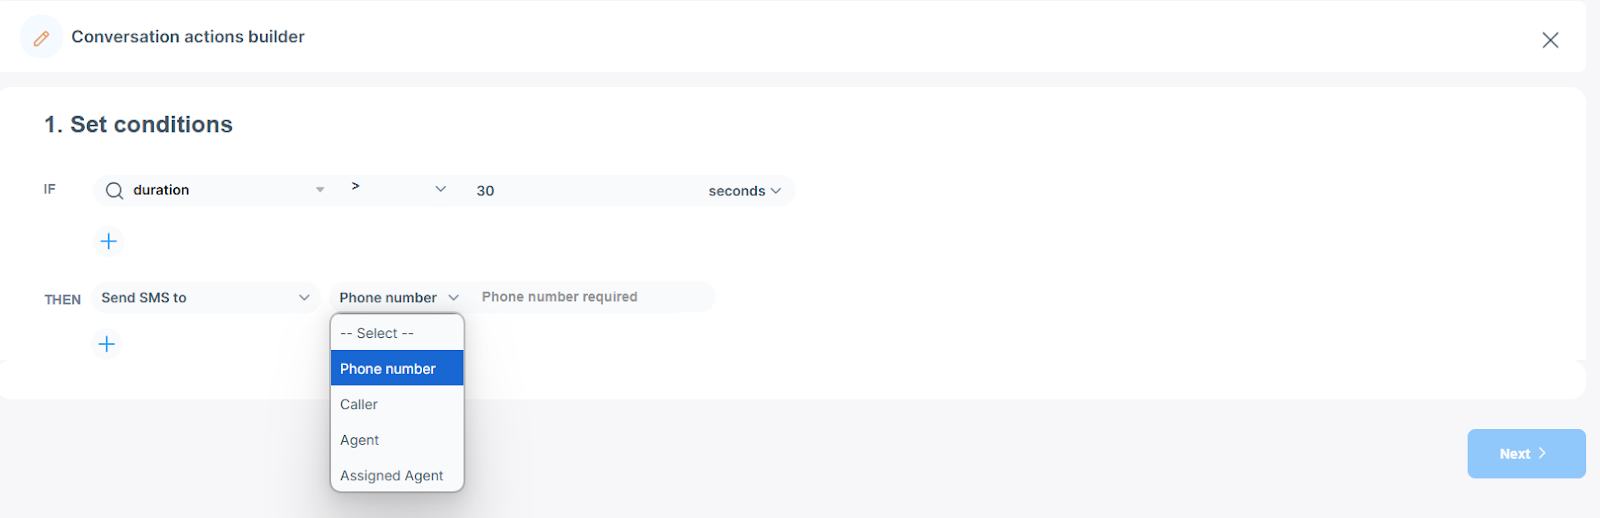
Based on the trigger, you can add a conversation action to the "Send SMS to" option. You will have four choices for this.
- Phone number: The user can enter any US phone number.
- Caller: SMS is sent to the caller Number. The user must enter an SMS and an opt-out message. When the customer Opts Out By replying ‘STOP’, they will receive an automated message, as shown in the screenshot.
- Agent: An SMS is sent to a user-chosen from a dropdown menu. Only users within the selected group can be selected.
- Assigned agent: SMS is sent to the assigned agent for the conversation.
Similar conversation action options are available under the Tracking Number settings, which apply to specific Tracking Numbers rather than the entire group. Click here.
Custom Sources:
To navigate to this page, Click on Settings→Group settings→Custom sources.
On this page, you can add all custom source types for the selected group in the breadcrumb. You can also search for custom sources here.
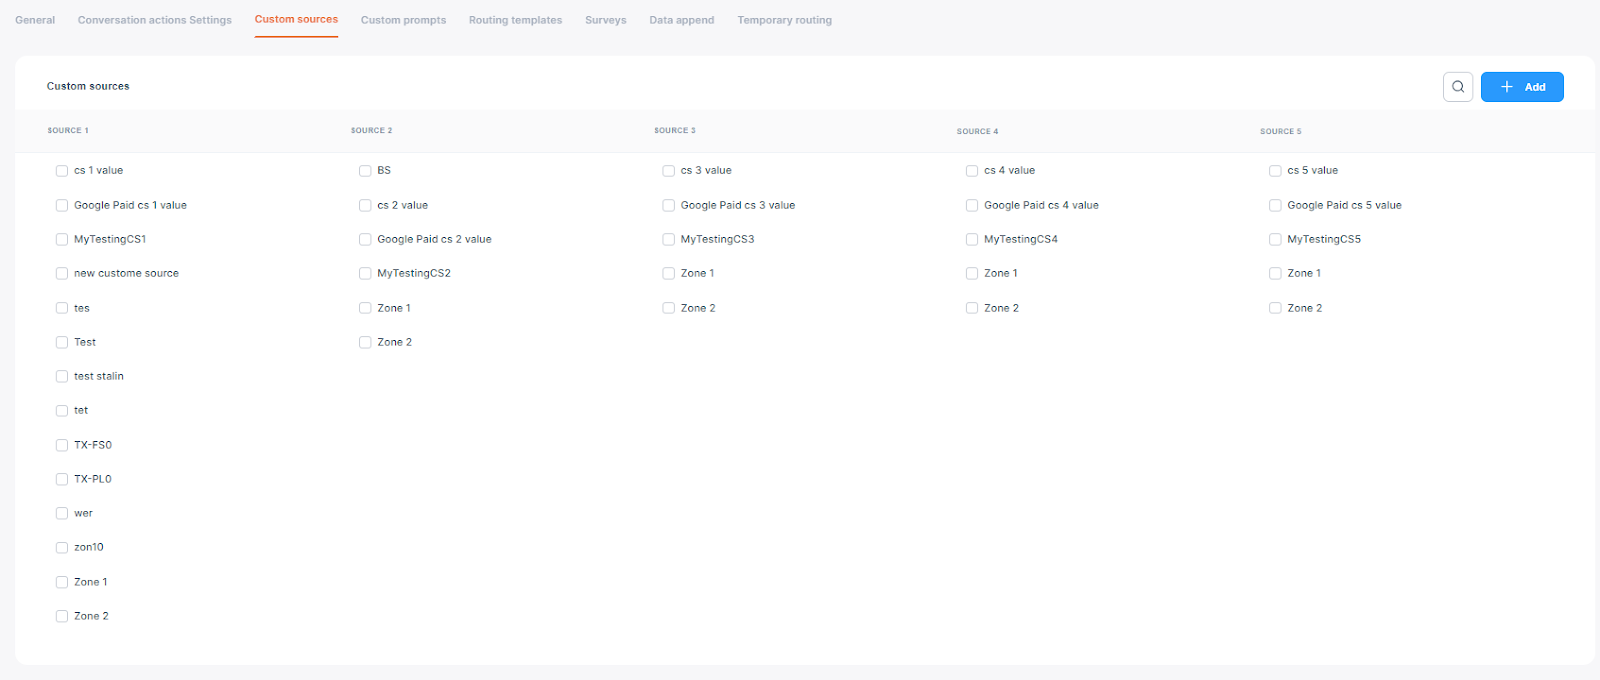
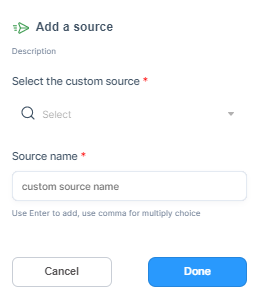
To add custom sources, click the "Add" button. From the drop-down menu, select the type of custom source you want to add. You can add either a single custom source or multiple sources at once. To add multiple sources, separate them with commas. Please note that you cannot add the same custom source more than once within the same group for the same source type.
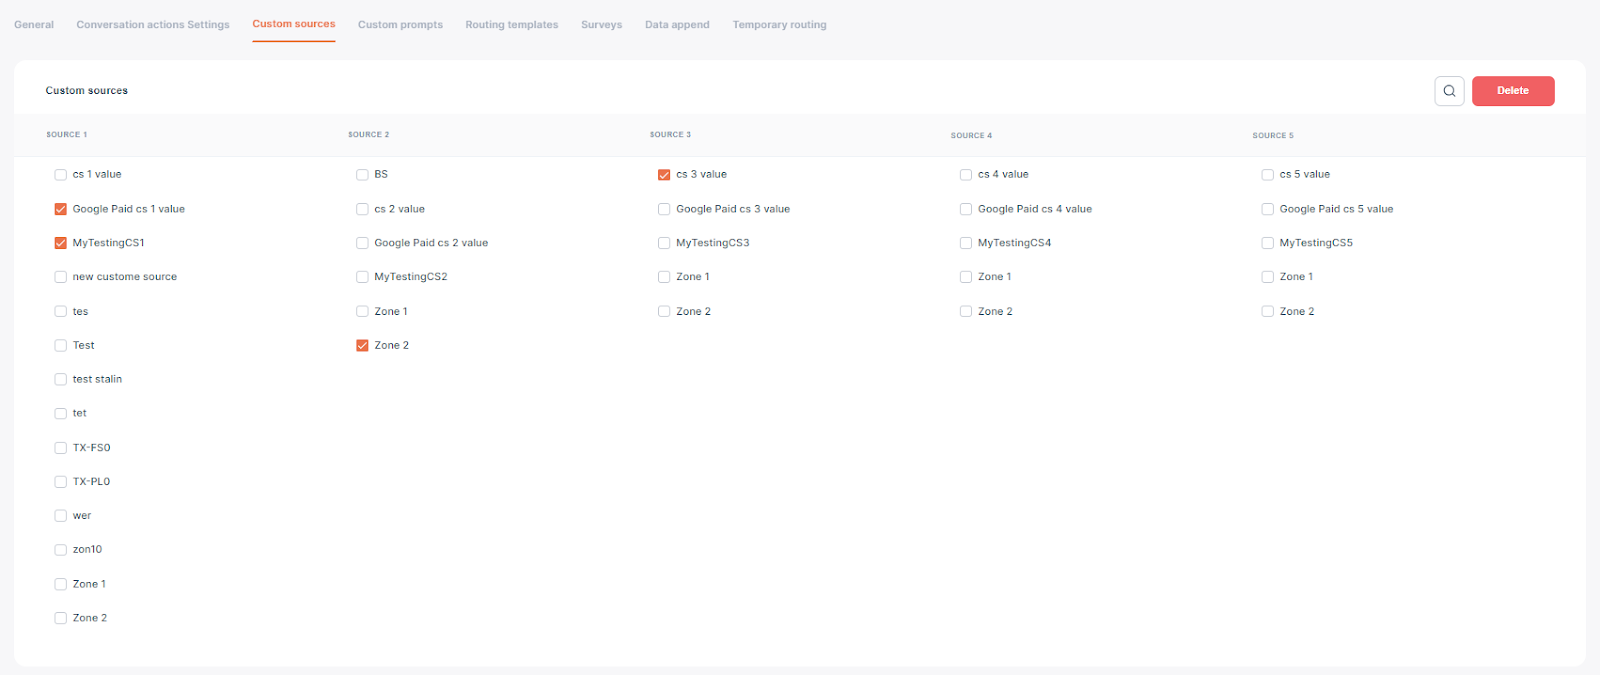
To remove the custom sources, select the sources you wish to delete and then click on the "Delete" button.
Custom prompts:
To navigate to this page, Click on Settings→Group settings→Custom prompts.
On this page, you can upload all audio files for the selected group in the breadcrumb. You can filter the list of custom prompts and also add new ones. Additionally, you have the option to filter the audio files.
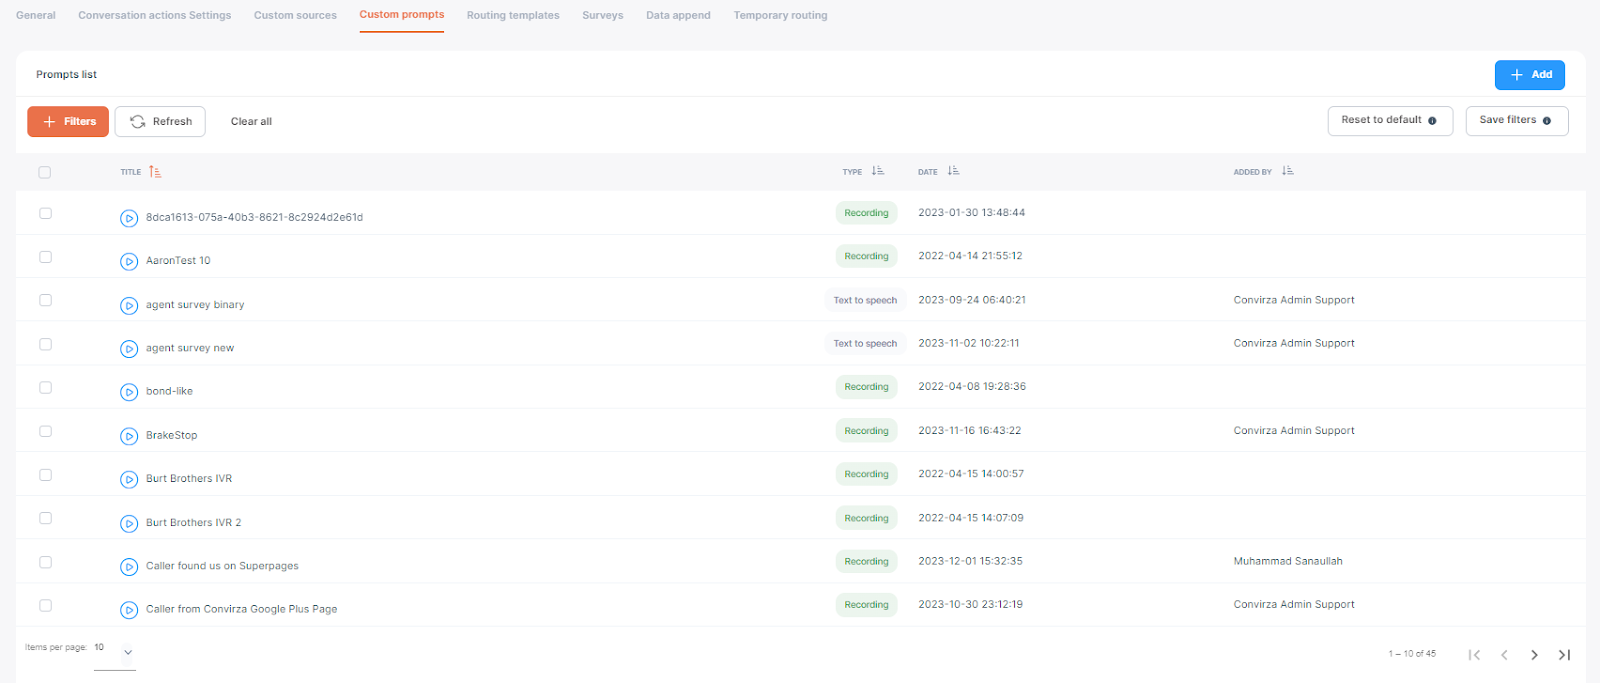
This page displays a list of all audio files with their details. You can also listen to the audio files directly from this page.
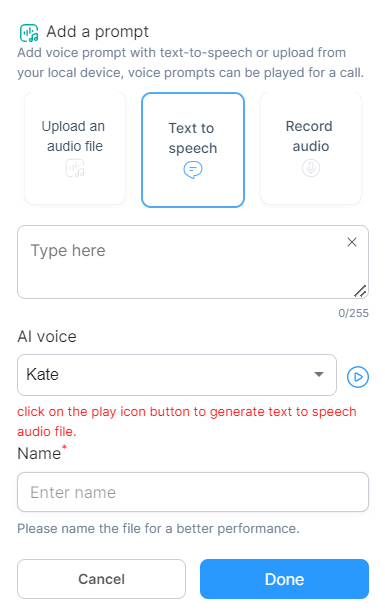

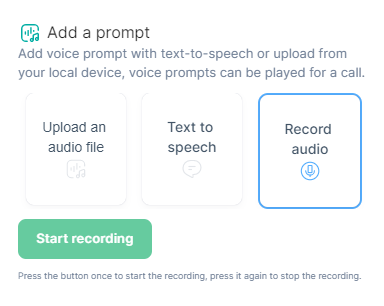
You can add the audio files with the three methods mentioned above.
- Upload an audio file - You can upload audio files from your computer.
- Text-to-speech: You can add text and select the options from the predefined list for the AI voice, and the entered text will be available in the selected voice as an audio file.
- Record audio - You can also record the audio in your own voice.
Click done when the audio file is selected.
To delete the file select the files with the help of the checkbox and click on delete.

Routing Templates:
To navigate to this page, Click on Settings→Group settings→Routing templates.
On this page, you can save templates for all route types associated with the selected group in the breadcrumb. This feature helps streamline the provisioning process by automatically pre-populating the options you saved in the routing templates when setting up the numbers for that particular group.
Additionally, you can filter the grid and download it directly from this page.
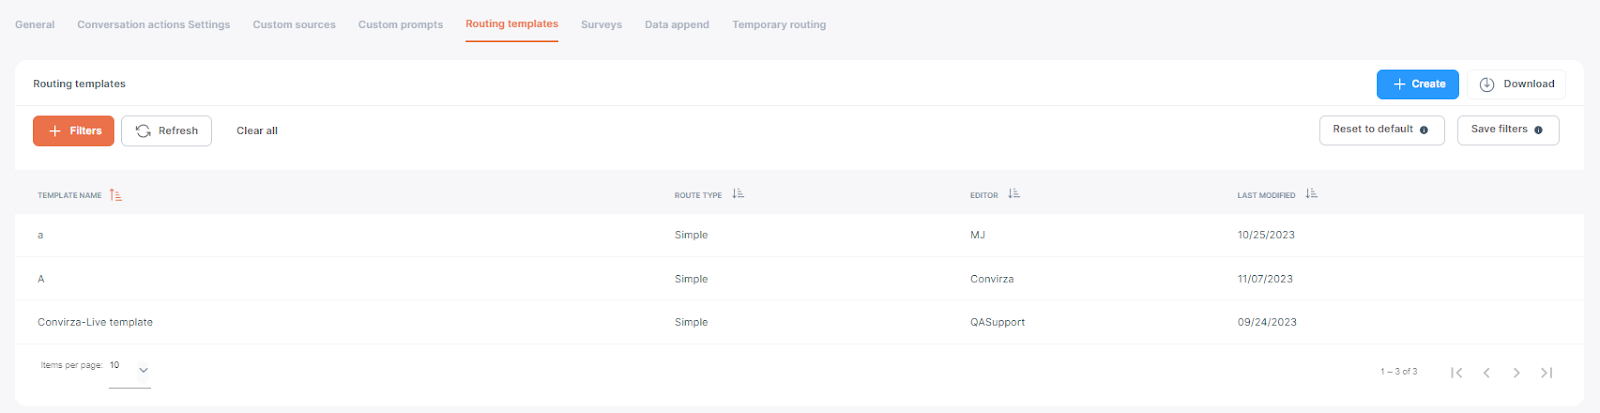
To create a new template, click on "Create," enter a name for the template, and then click "Next."
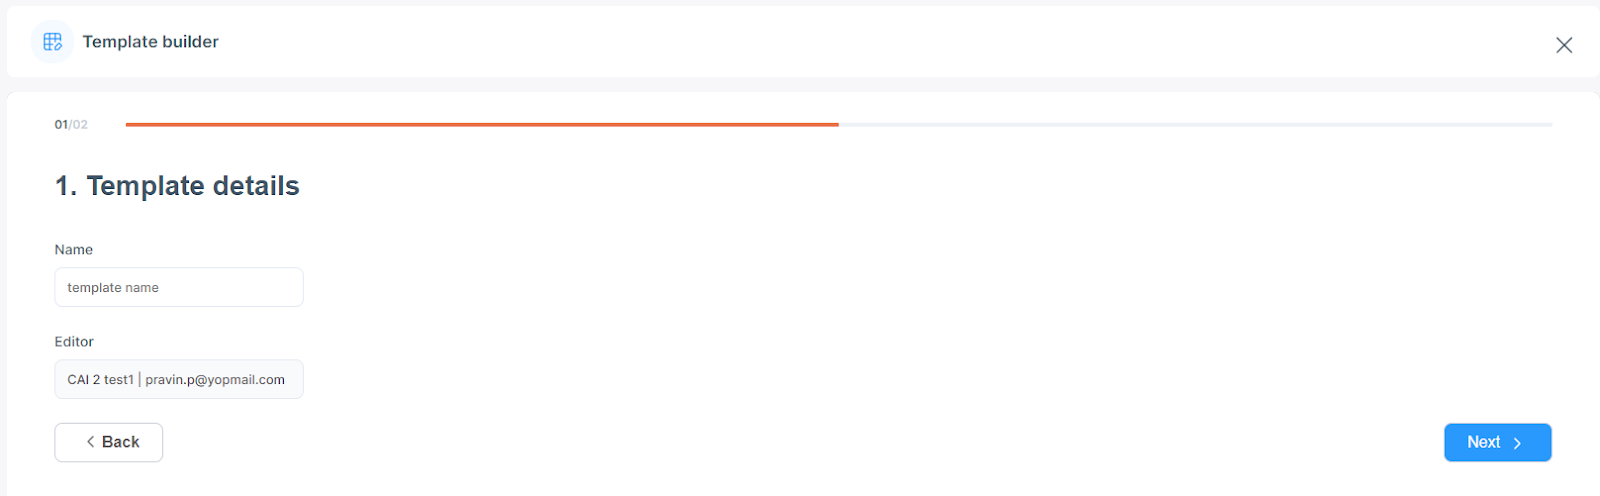
Selecting a different type of route will provide various settings. Fill in the information and click Next.

To delete a template, click on its row in the grid to open the template details. Then, click on Delete.

Surveys:
To navigate to this page, Click on Settings→Group settings→Surveys.
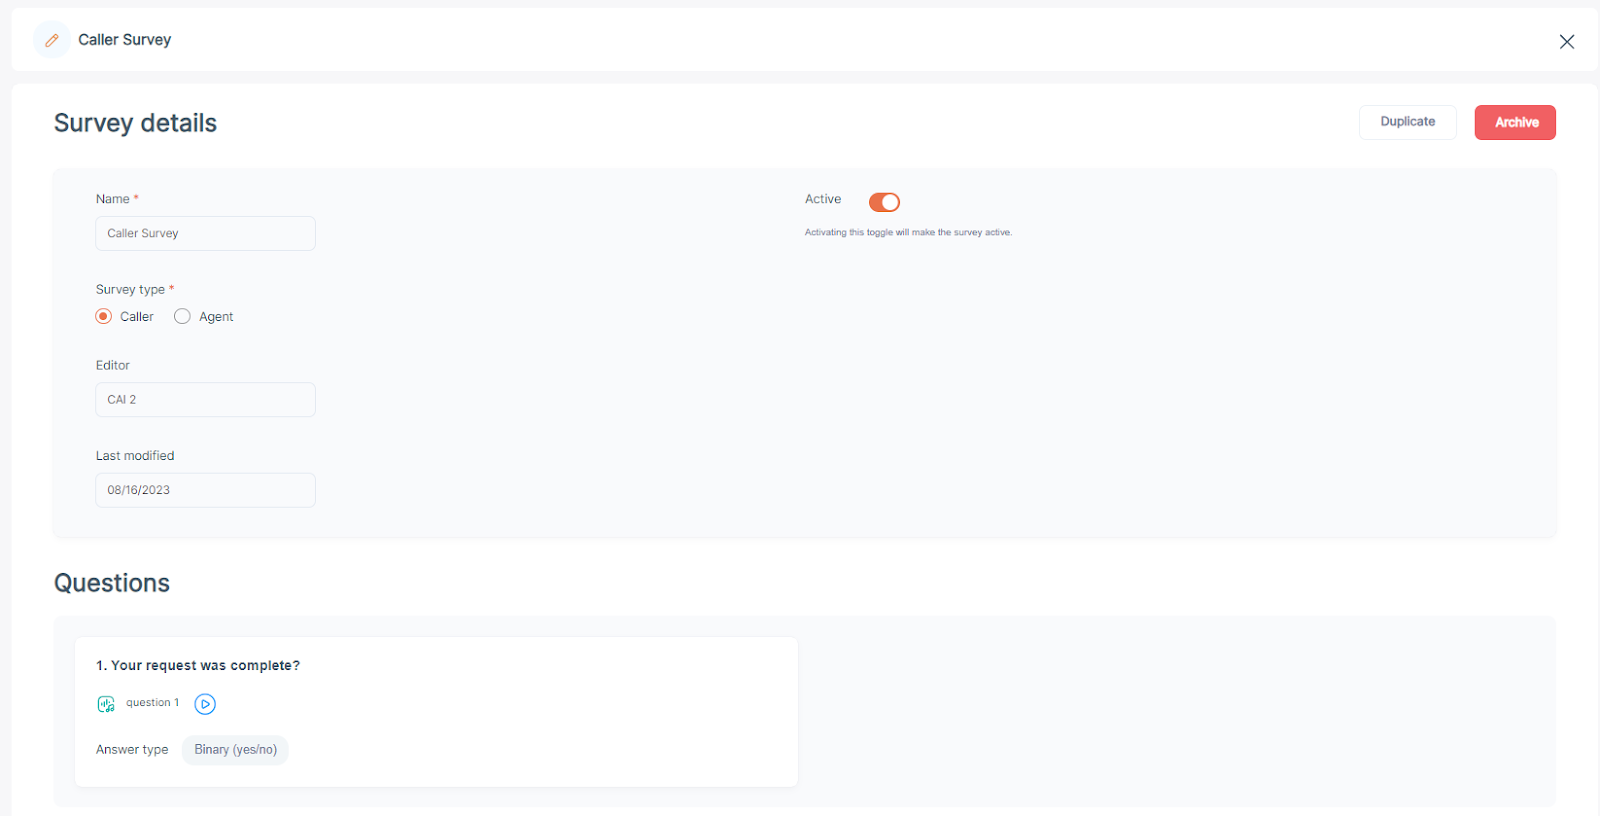
On this page, you can save survey templates for all route types associated with the selected group indicated in the breadcrumb. This page displays a grid containing all the saved surveys, which will be automatically populated for each tracking number created under that specific group.
To create the survey, click on "Create." This action will open a new window.
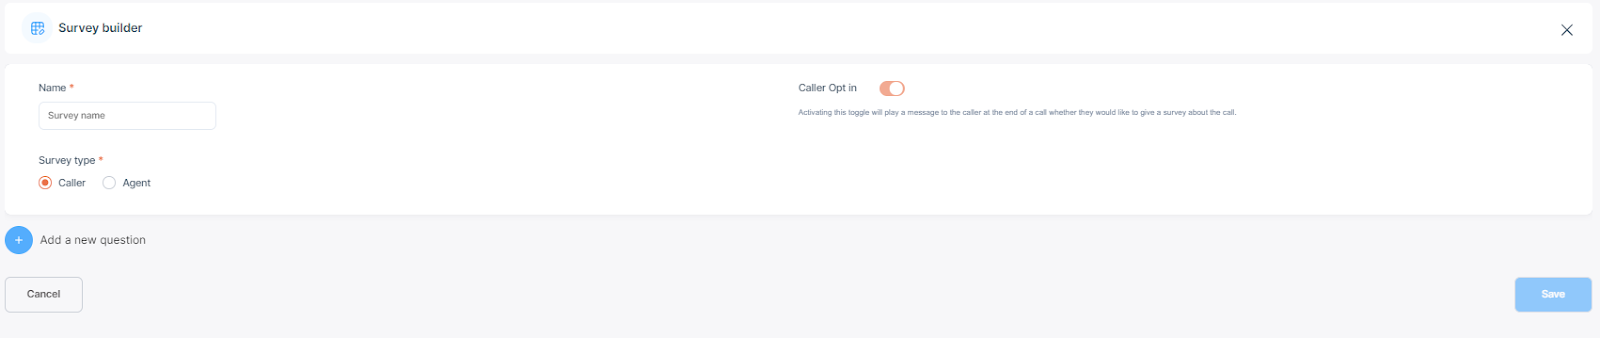
Name the survey and choose the type: Caller or Agent. You can select "Caller Opt-In" for a caller survey or "Agent ID Prompt" for an agent survey.
Add the questions, choose the types of answers, and save the survey. You will also have the option to delete questions at this stage.

You can select any survey in the grid to duplicate or archive it.
Data Append:
To navigate to this page, Click on Settings→Group settings→Data Append.
Our optional data append lookup service captures and displays third-party information associated with a caller's phone number through a reverse phone number lookup. This information is presented in a consolidated format, providing a comprehensive view of the caller. It can be utilized in various ways to support strategic decision-making.
We successfully obtain complete information for over 65% of all calls. For more than 96% of calls, we gather at least one of the following details: business name, caller's name, gender, address, city, state, zip code, country, carrier, and rate center. This data will be available in reports labeled "Call Logs with Data Append" and "Call Logs Extended."
You will get the toggle to activate or inactivate this option on this page.
Temporary Routing:
To navigate to this page, Click on Settings→Group settings→Temporary Routing.
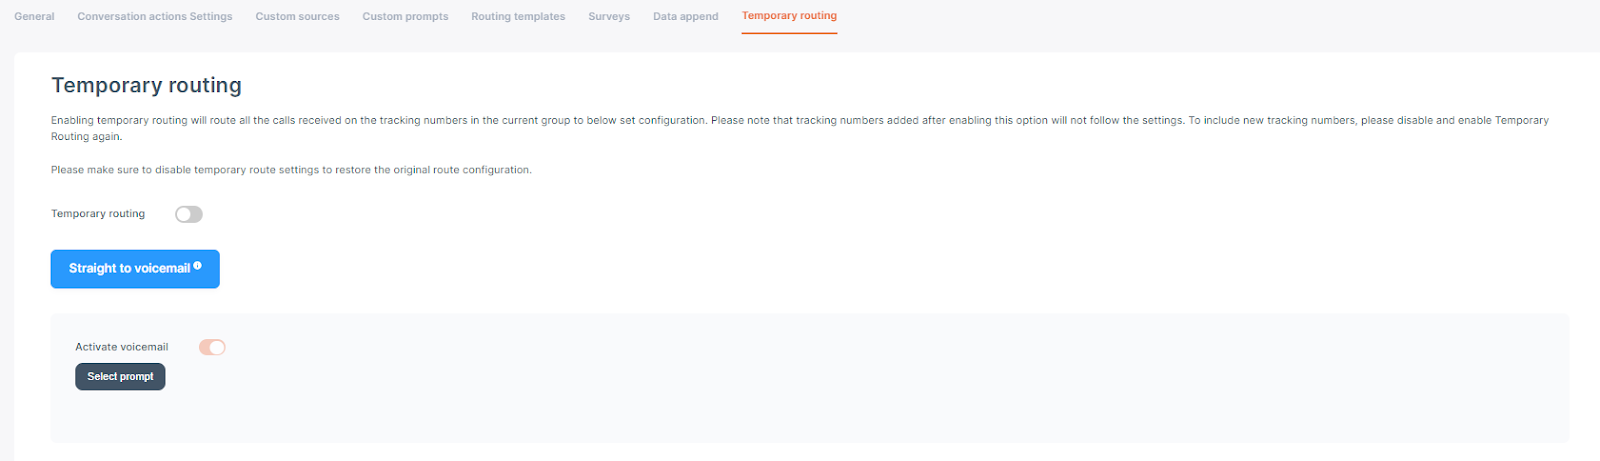
Activating temporary routing will direct all calls received on the tracking numbers within the current group to the configuration set below. To restore the original routing settings, temporary routing must be disabled.
Currently, the only option available for temporary routing is to send calls directly to voicemail. Please note that selecting a voice prompt is mandatory.