Tracking Numbers
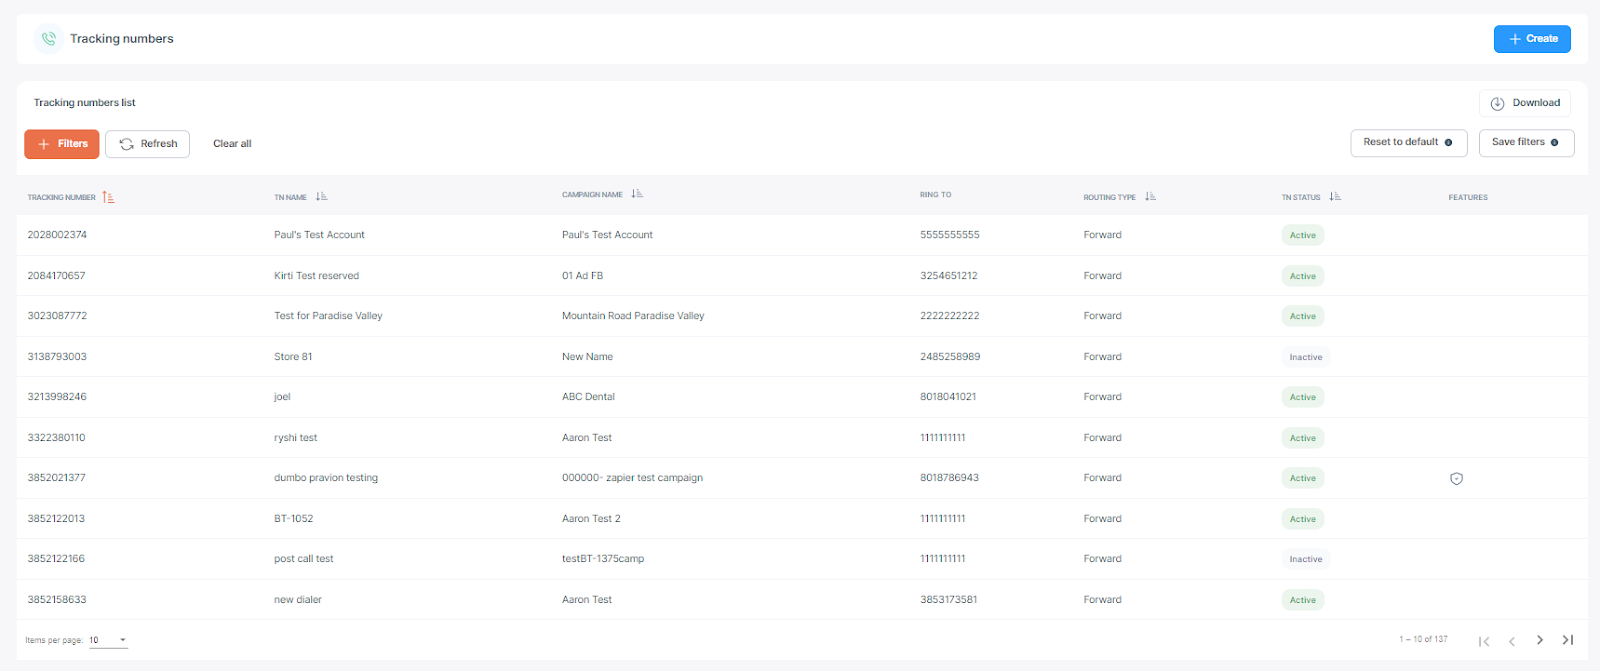
To navigate this page, Click Tracking Numbers on the left menu.
On this page, you can add the Tracking numbers under the campaign for the selected group in the breadcrumb. You get the option to filter and download the grid as well.
You can save the filters for this page by selecting the filters of your choice and clicking on save filters. Whenever you visit this page after saving the filters, the grid will show the data according to the saved filter by default.
If you click on Reset to default, these filters will be removed.
You can provision the Local, 800-Toll Free, and Vanity tracking numbers.
Convirza offers ten tracking number routing options:
- Forward
- Interactive Voice Response (IVR)
- Georoute
- Simultaneous
- Percentage
- Hangup
- Schedule
- Straight to Voicemail
- Outbound
- Round robin
To set up a Tracking Number, please follow these steps:
- From the left-hand menu, select “Tracking Numbers.” If the user would like the Tracking Number associated with a subgroup, select that subgroup from the breadcrumb before moving on to Step 2.
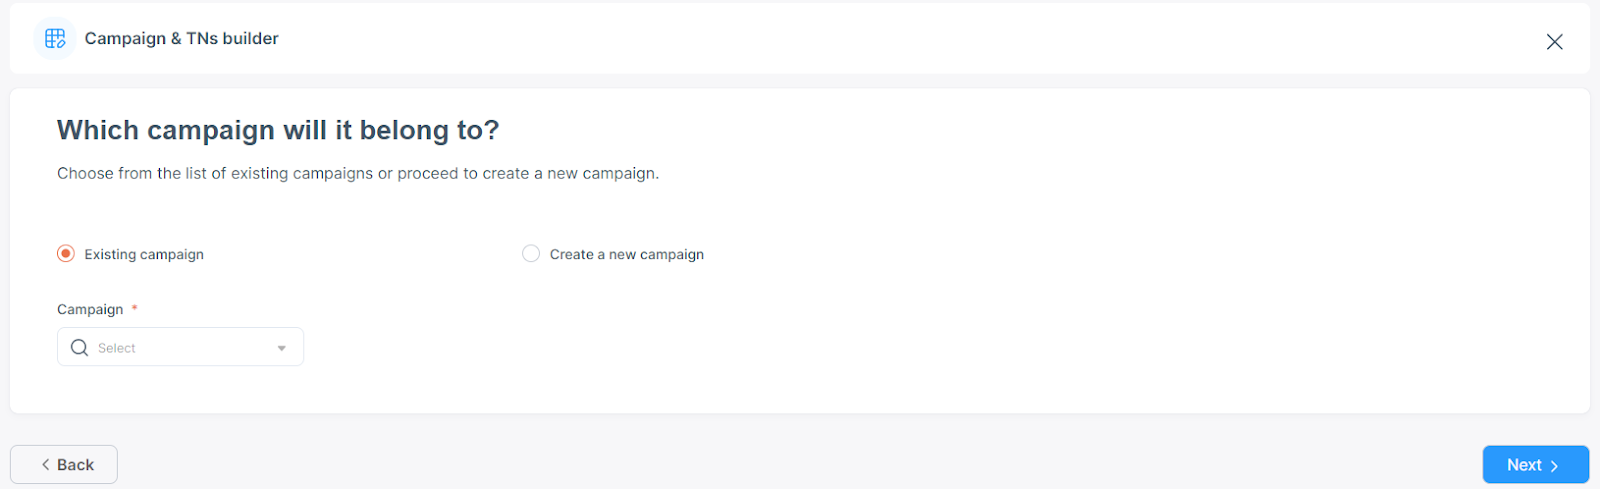
- Click Create and select the existing campaign from the drop-down.
- Click ‘Create a new campaign’ to create a new one.
- The add Tracking Number section consists of the following
4.1 Configure Number
4.2 Configure Routing Options
4.3 Advanced Tracking Number Settings
4.3.1 Advanced Settings
4.3.2 Dynamic Number
4.3.3 Surveys
- Fill out your tracking number settings and click Save.
Following are the Feature Descriptions for a Tracking Number:
A) Configure Number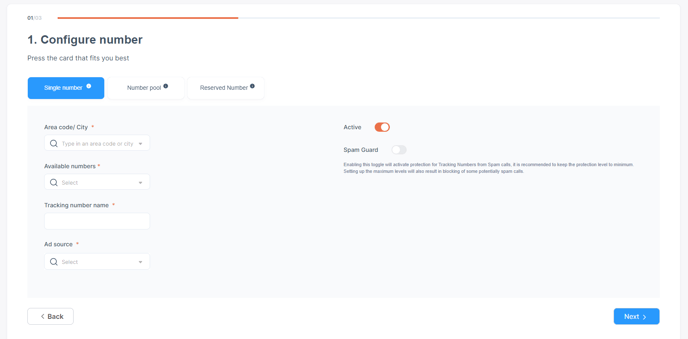
We can provision 3 types of numbers using any of the above route types.
- Single Number: A single number is used for a toll-free or local tracking number. Convirza has an extensive inventory. From here, toll-free and local numbers can be chosen.
- Number Pool: A number pool is used when there is a requirement for a number pool for Session Dynamic Number Insertion (DNI).
- Reserved Number: Reserved numbers are reserved by particular customers for future use. This includes all ported, True 800, Vanity, and Repeater numbers.
Area Code/City (NPA-NXX): “NPA” stands for Number Plan Area, commonly called Area Code. “NXX” refers to the three digits of a phone number immediately following the area code, also called the “exchange” or the “Central Switching Office Designation. In the number (555) 222-3333, the NPA is “555” and the NXX is “222”.
Tracking Number: The tracking number is the unique toll-free, premium, or local number the customer will call.
Active: If the toggle is set to Active for the tracking number, then it becomes active, and if the tracking number is toggled to inactive, then it becomes inactive.
Spam Guard: Spam Guard is a feature that does not allow conversations coming from a spam caller id to enter the system. It can be turned ON/OFF. This option is also available on the group default setting, and once turned ON/OFF on the group default setting, this setting applies to all the new+ tracking numbers created under that group.
Tracking Number Name: The tracking number name is an identifier for each tracking number. This will appear in all reports and help in recognizing the number.
Ad Source: Ad sources are all online and offline advertising platforms available in CAI. It is the starting point for attracting the target audience. This is a mandatory field for setting every tracking number. Ad source determines the platforms where the tracking number will be displayed. It can also be seen in the conversation Logs and Account Details reports.
SMS: The SMS feature allows you to send and receive messages on the tracking number. For detailed information about SMS, please visit SMS Conversations
You can navigate to the settings→Customization→SMS from here to customize the Click-to-text and SMS templates and SMS user settings.
You can also download the campaign registration forms for DID/Local and toll-free numbers.
B) Configure Routing Options
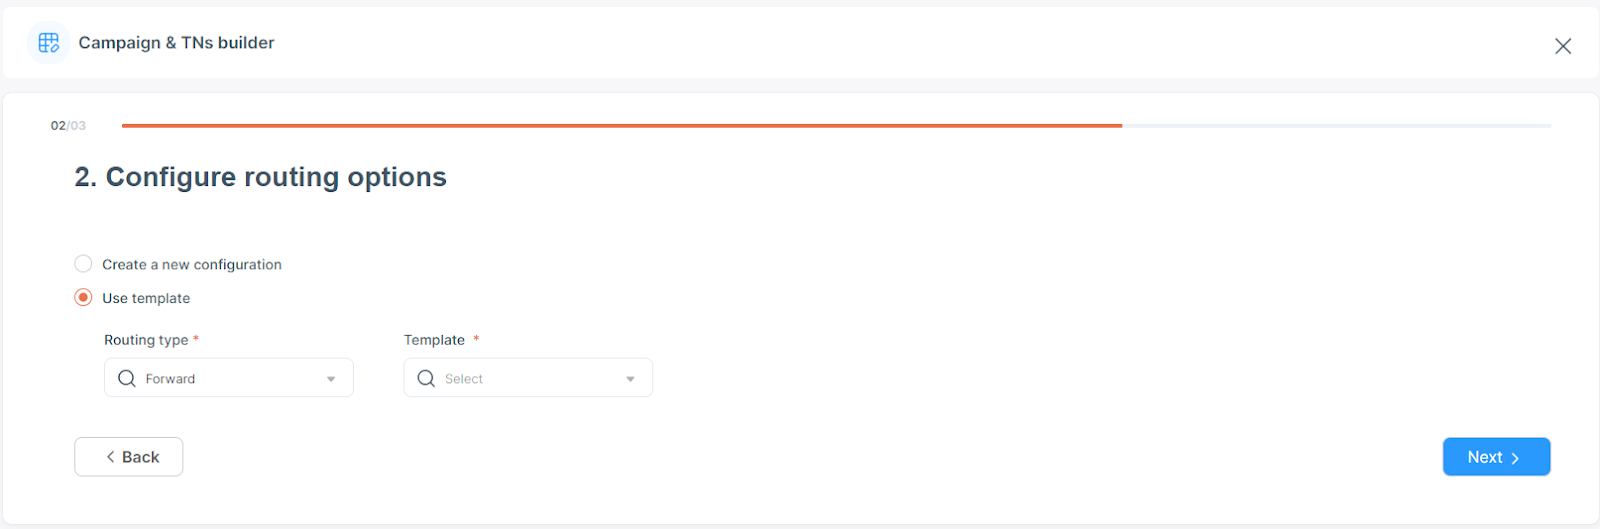
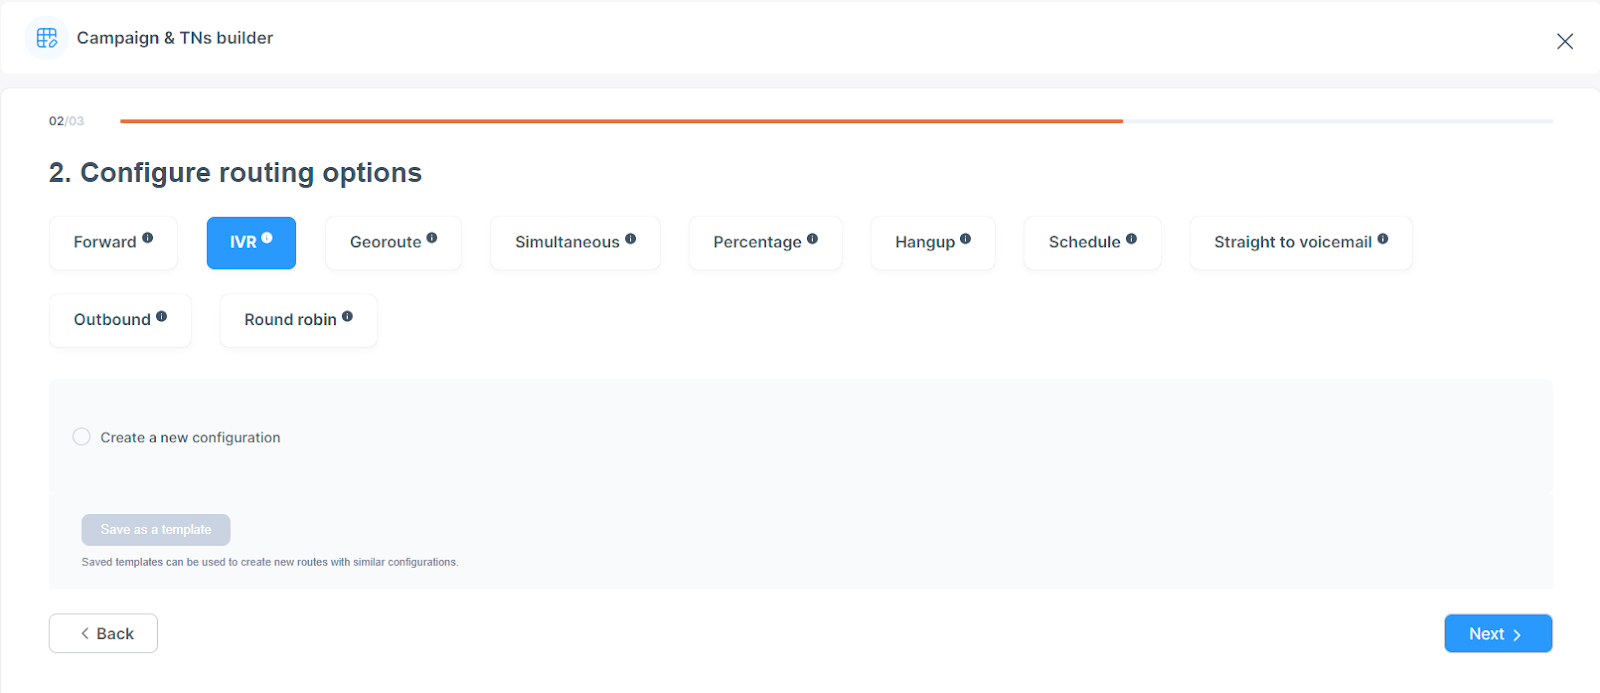
You can select ‘Create a new configuration’ to provision the number or choose the route type from the dropdown and a template. If you select a template, the templates saved under routing templates under group settings for a particular group will be available here.
Choosing the templates will pre-populate the saved template settings while configuring the number.
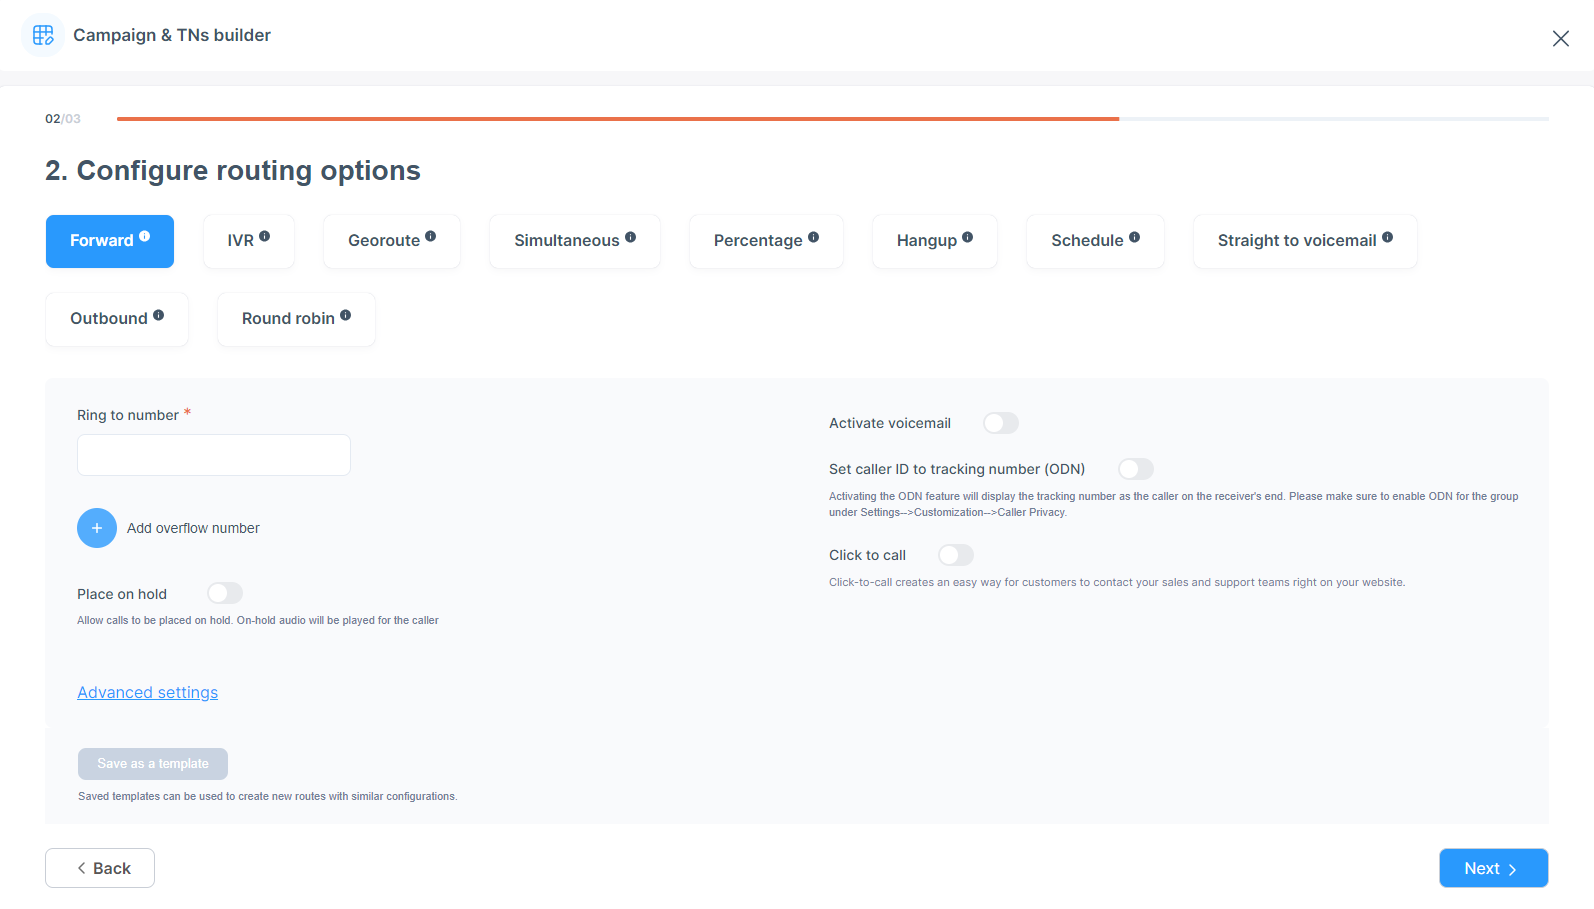
Forward
The forward route type is used when the user wants just to forward the number to the ring to number. When the caller calls on the tracking number, it will be forwarded to the ‘Ring to number’ when the forward route type is used.
IVR
The system provides the configuration of multi-levels of IVR with options. Callers can easily and directly reach appropriate departments or persons when a call is placed on the tracking number. The information about other settings, like Record conversation, voice prompt, whisper, etc. are added under the ‘Advanced Tracking Number’ settings section.
We also have IVR with voice functionality available in CAI. The keywords for "keypress number" & "destination name" will be recognized by default. Here, you can add any additional keywords for identifying this keypress/destination (Press the "Enter" key after entering the keyword).
The caller can select the keypress or say it when asked to select the option. We should add the same message in the voice prompt, directing the caller to select appropriately.
In this example, if the caller presses one on the phone or says ‘1’ or ‘Sales,’ the call will be forwarded to the sales department. Also, if the caller mentions ‘New Car’ or ‘New Tires,’ the call will be forwarded to the Sales department.


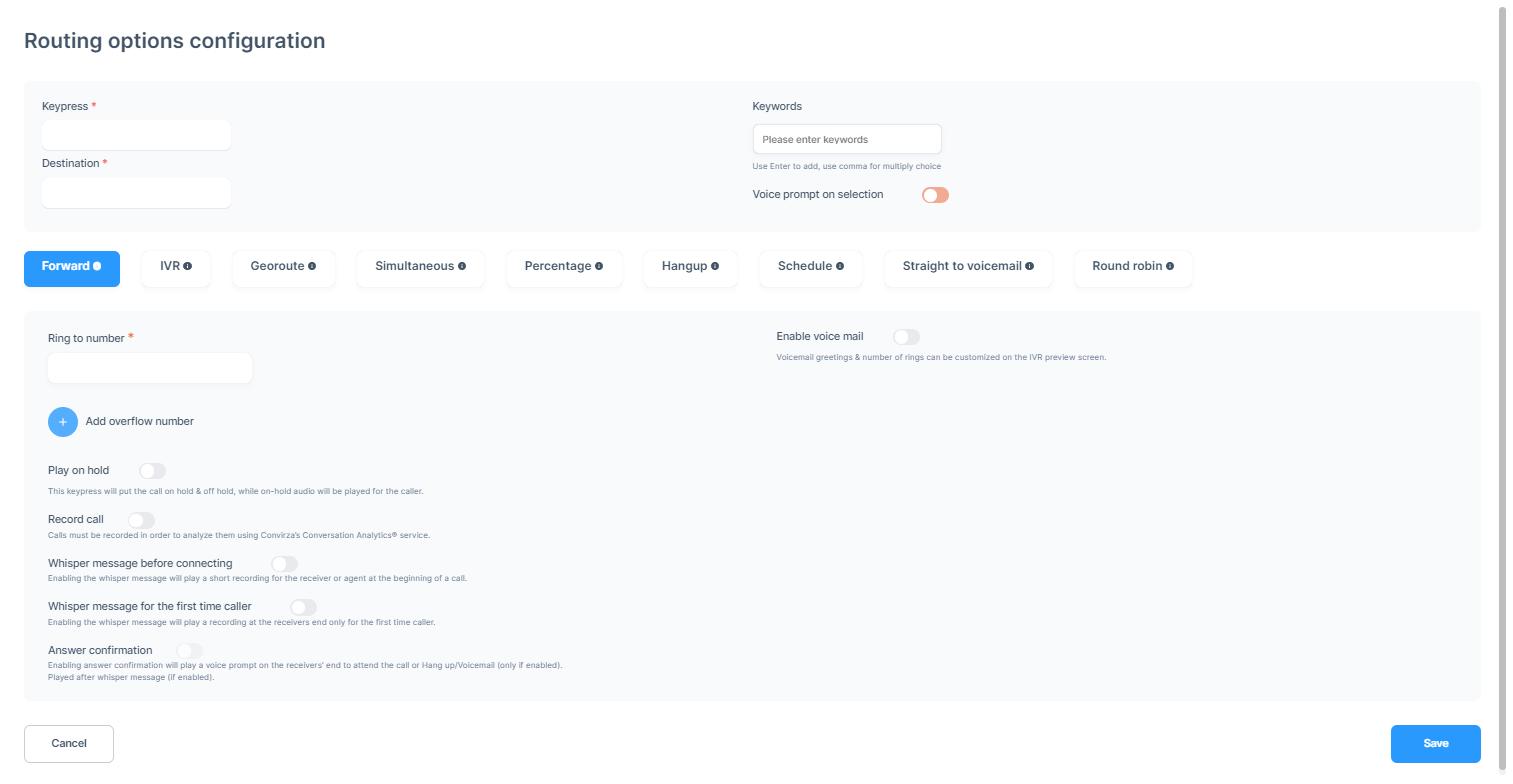
You can add any route from the available list to a different keypress. You can add up to four levels of IVRs.
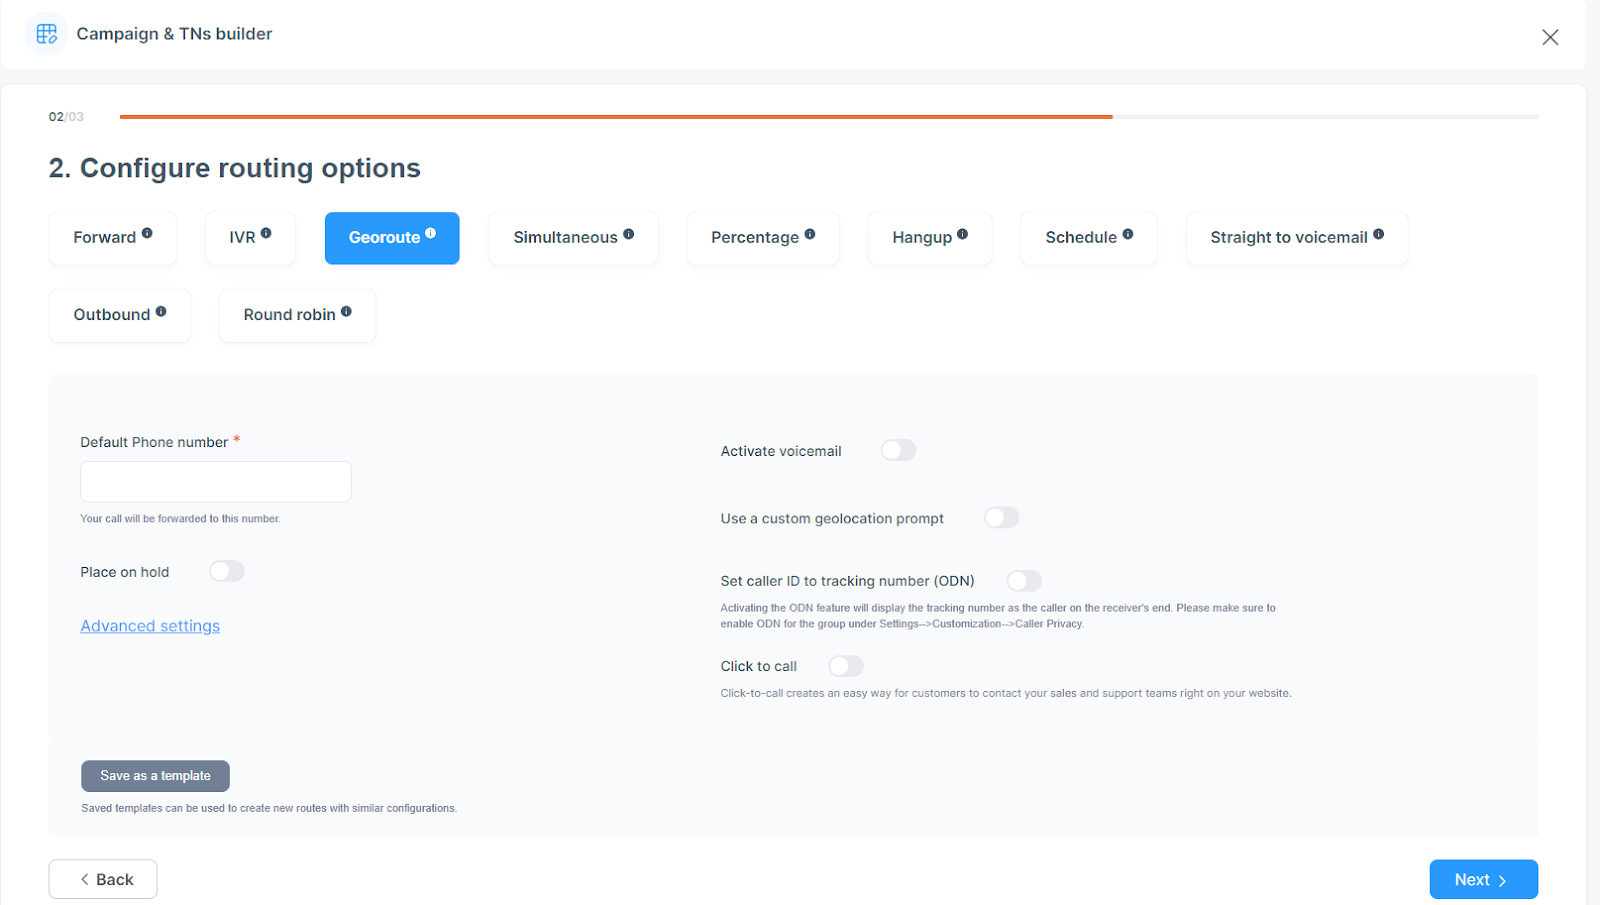
Georoute
Georoute to a location is best used when a customer has multiple locations that he would like to route calls to. A locations list should be created first under Settings > Customization > Georoute to use this type.
The calls will be routed to the location with the claimed zip code nearest to the Caller’s Zip Code.
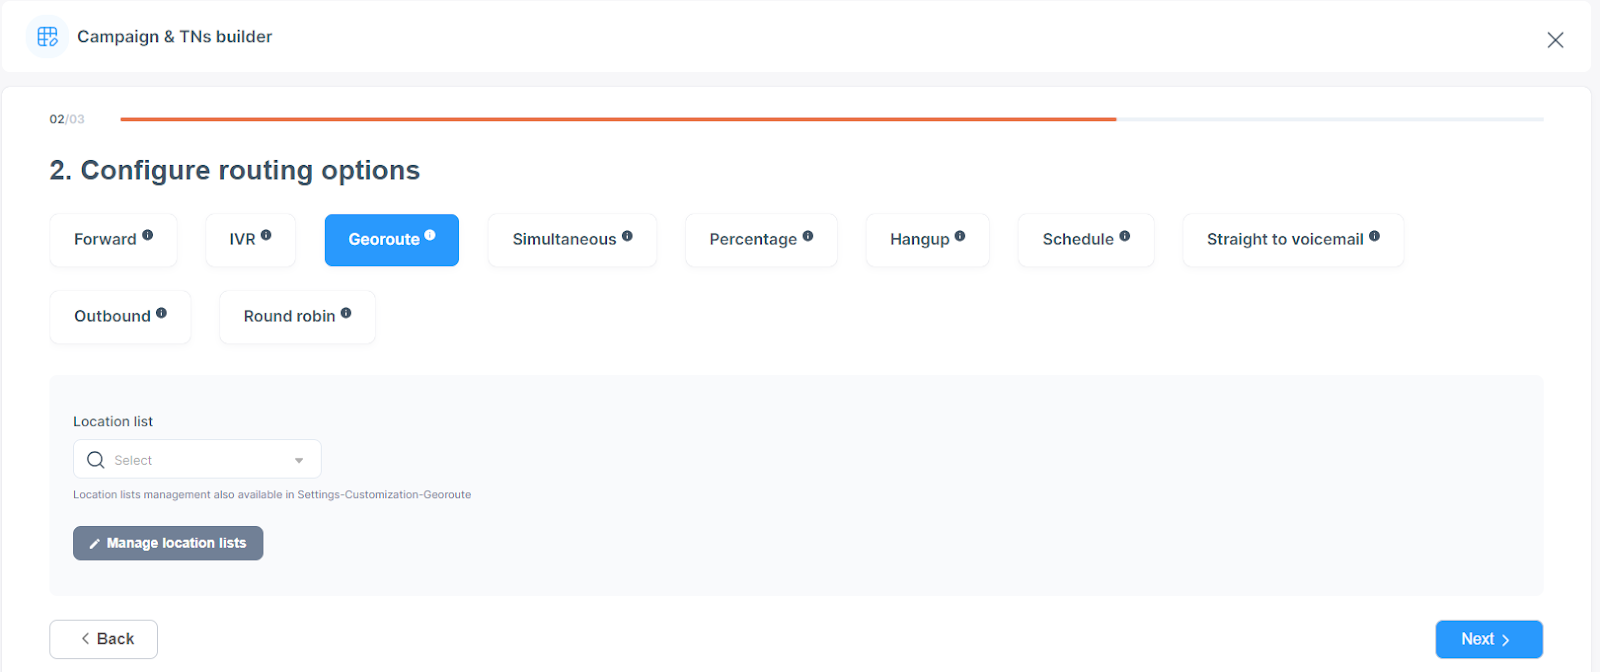
Select a location list from the drop-down menu or create a new one by clicking on Manage Location List, which will direct you to the page Customization → Georoute. Please follow the instructions in the Customization section to add the new location.
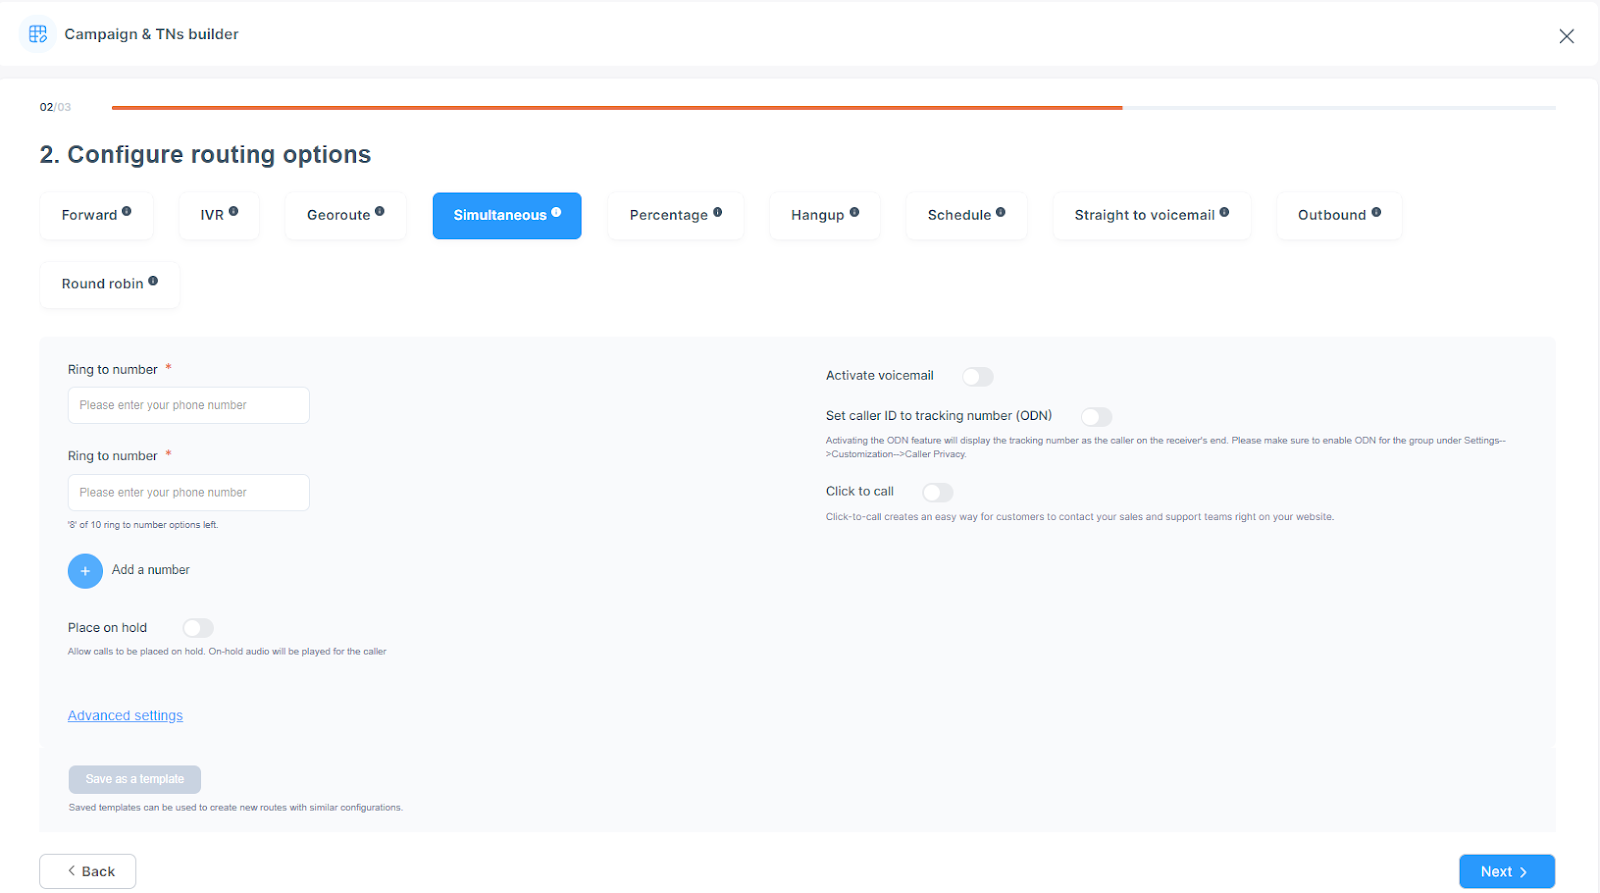
Simultaneous
A simultaneous route type is used when the user wants all the ring to numbers to ring simultaneously.
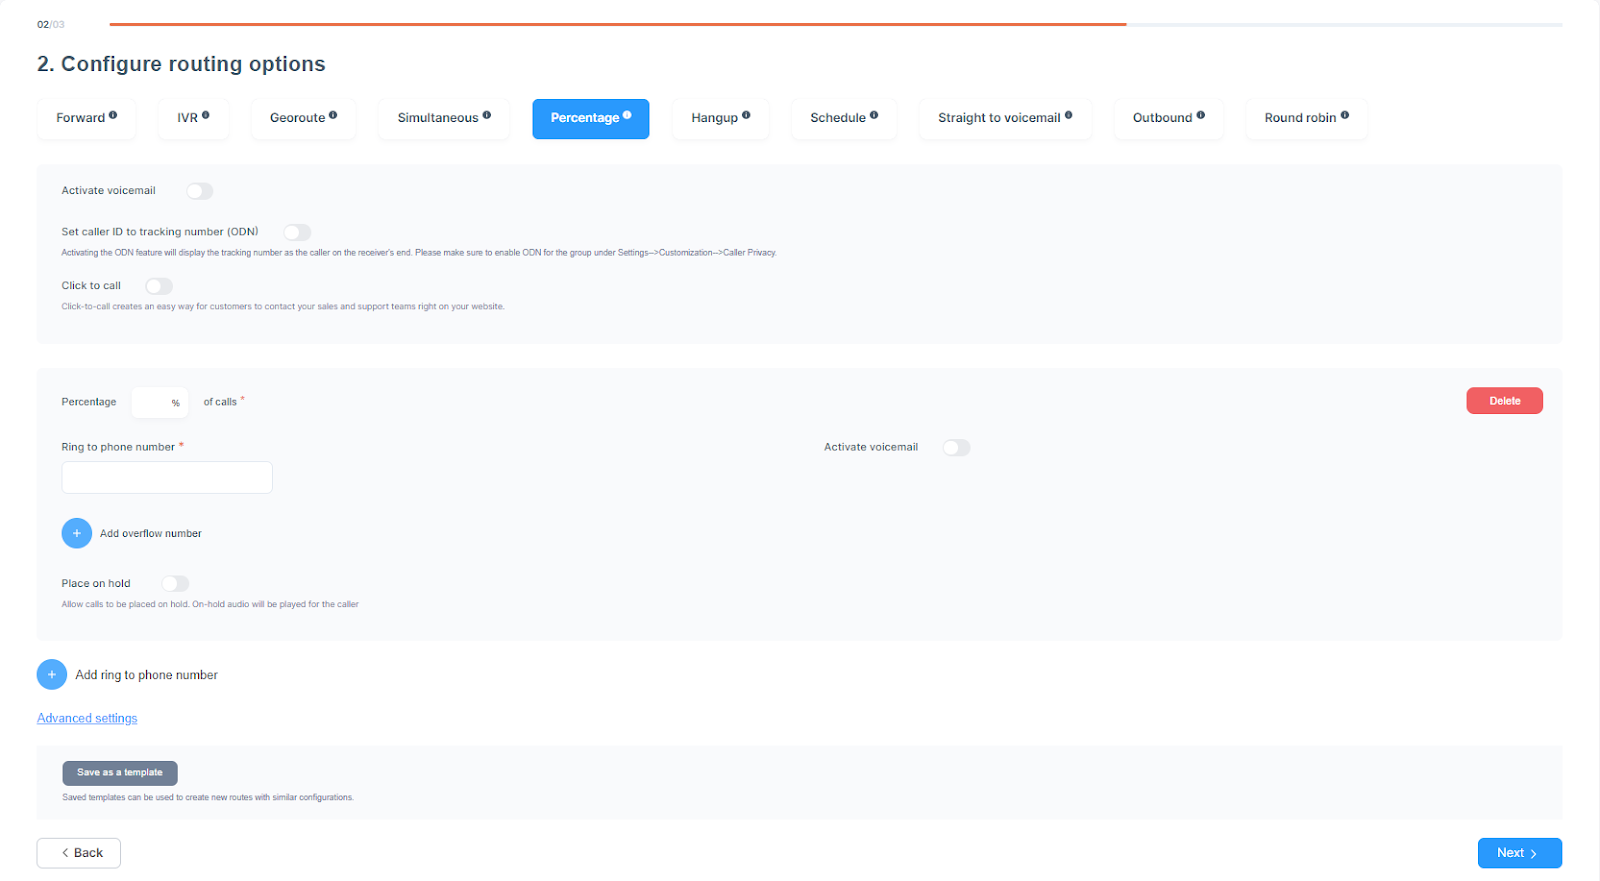
Percentage
Percentage routing type allows forwarding calls based on which forwarding number should receive what percentage of calls. This feature adjusts the call volume based on the number of agents.
For example, 50% of calls should go to Agent A, while 50% should be directed to Agent B.
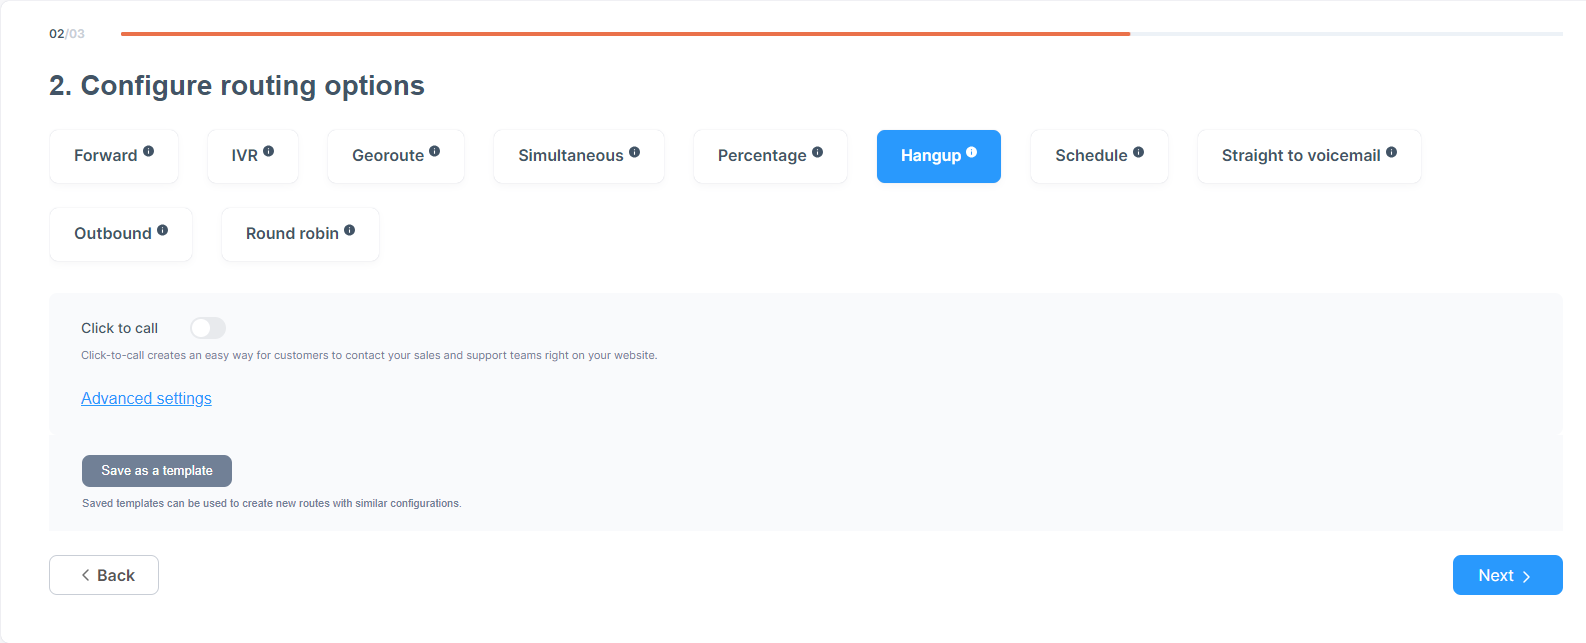
Hangup
The hangup route type simply hangs up the call placed on the tracking number.
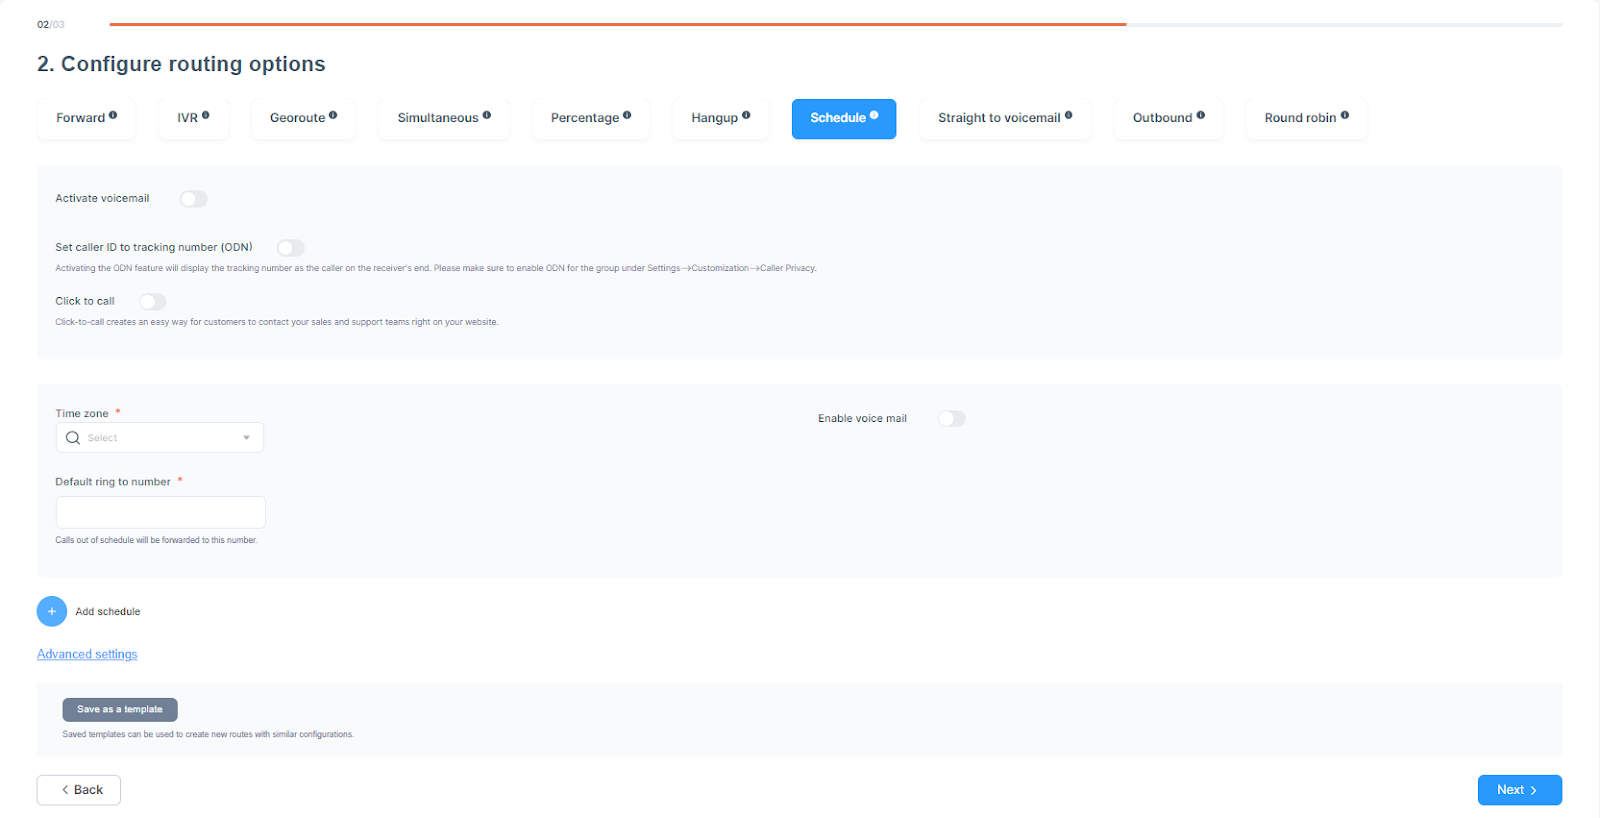
Schedule
Schedule route type allows the users to route calls to different ring-to numbers based on the time of day and/or day of the week. Schedules can be set for different times of the day and different days of the week.
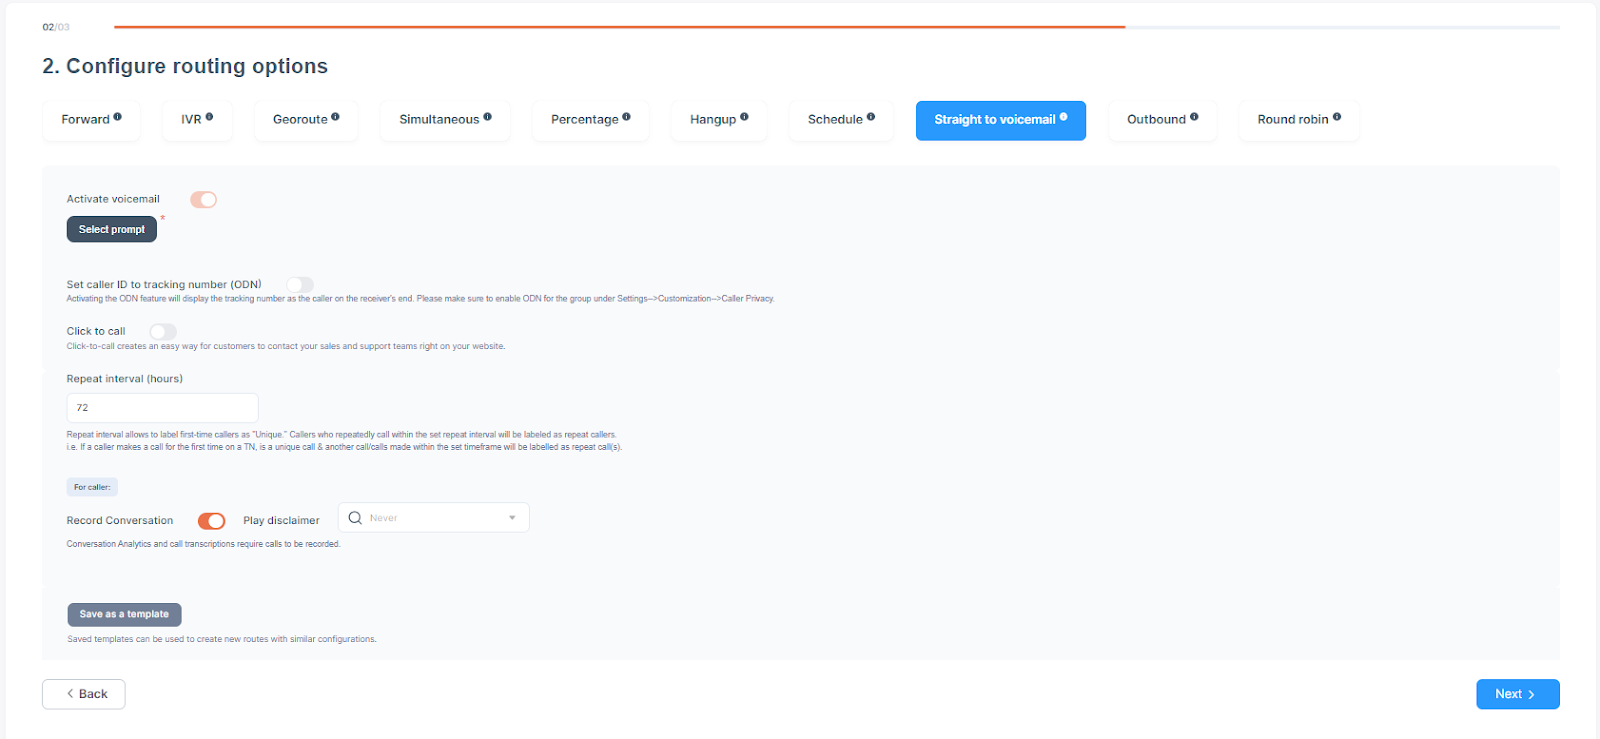
Straight to voicemail
By configuring a Tracking Number to be directly sent to voicemail, the caller can leave a message when agents cannot answer. Click on the activate voicemail checkbox to configure it on the tracking number.
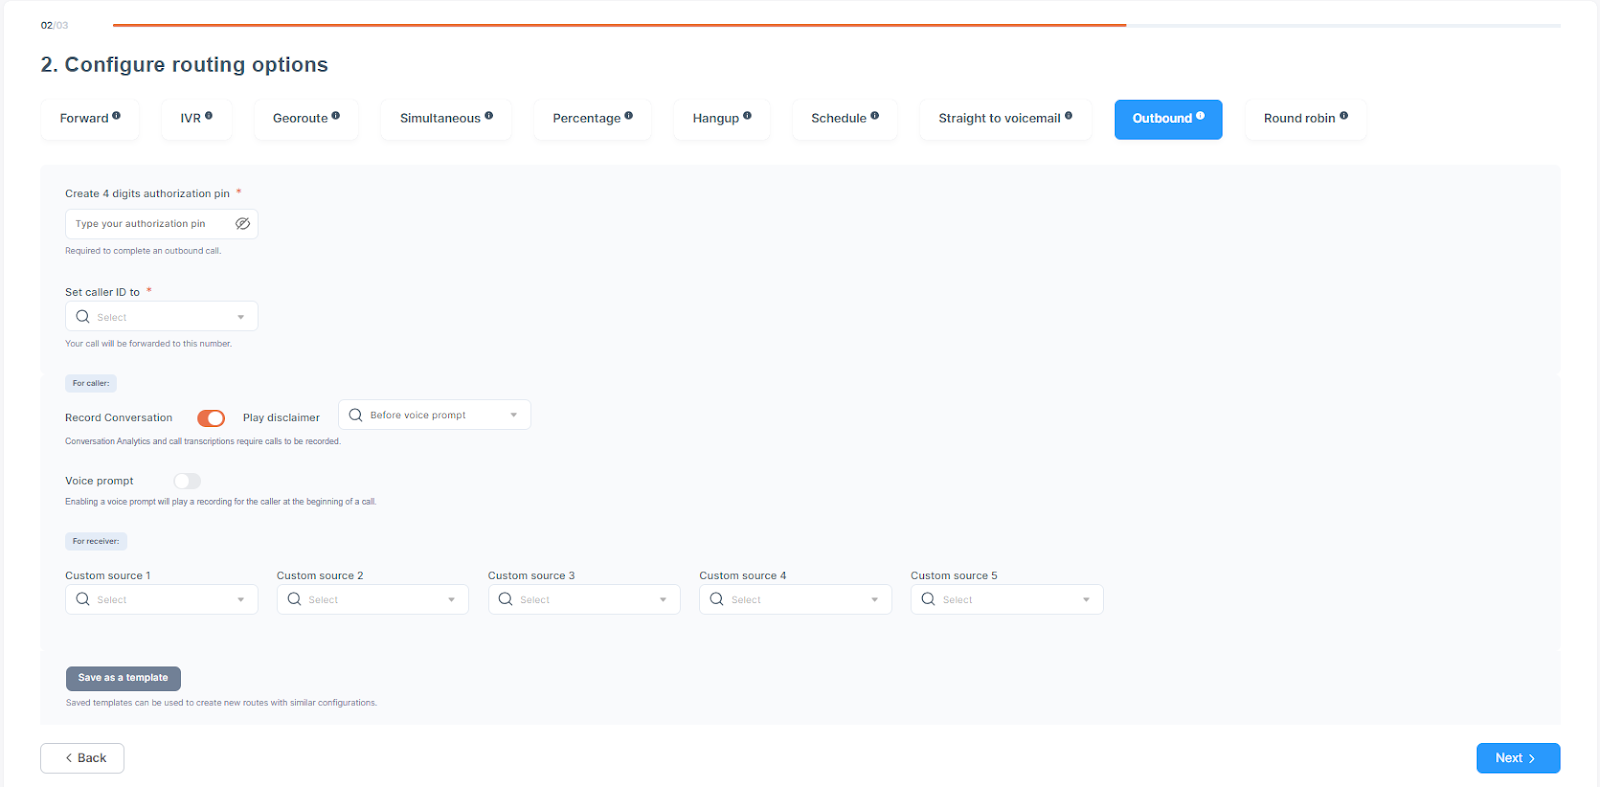
Outbound
The outbound route allows agents to call their leads, prospects, and customers. The user can set a 4-digit authentication pin for making outbound calls. The authentication pin is not mandatory to set.
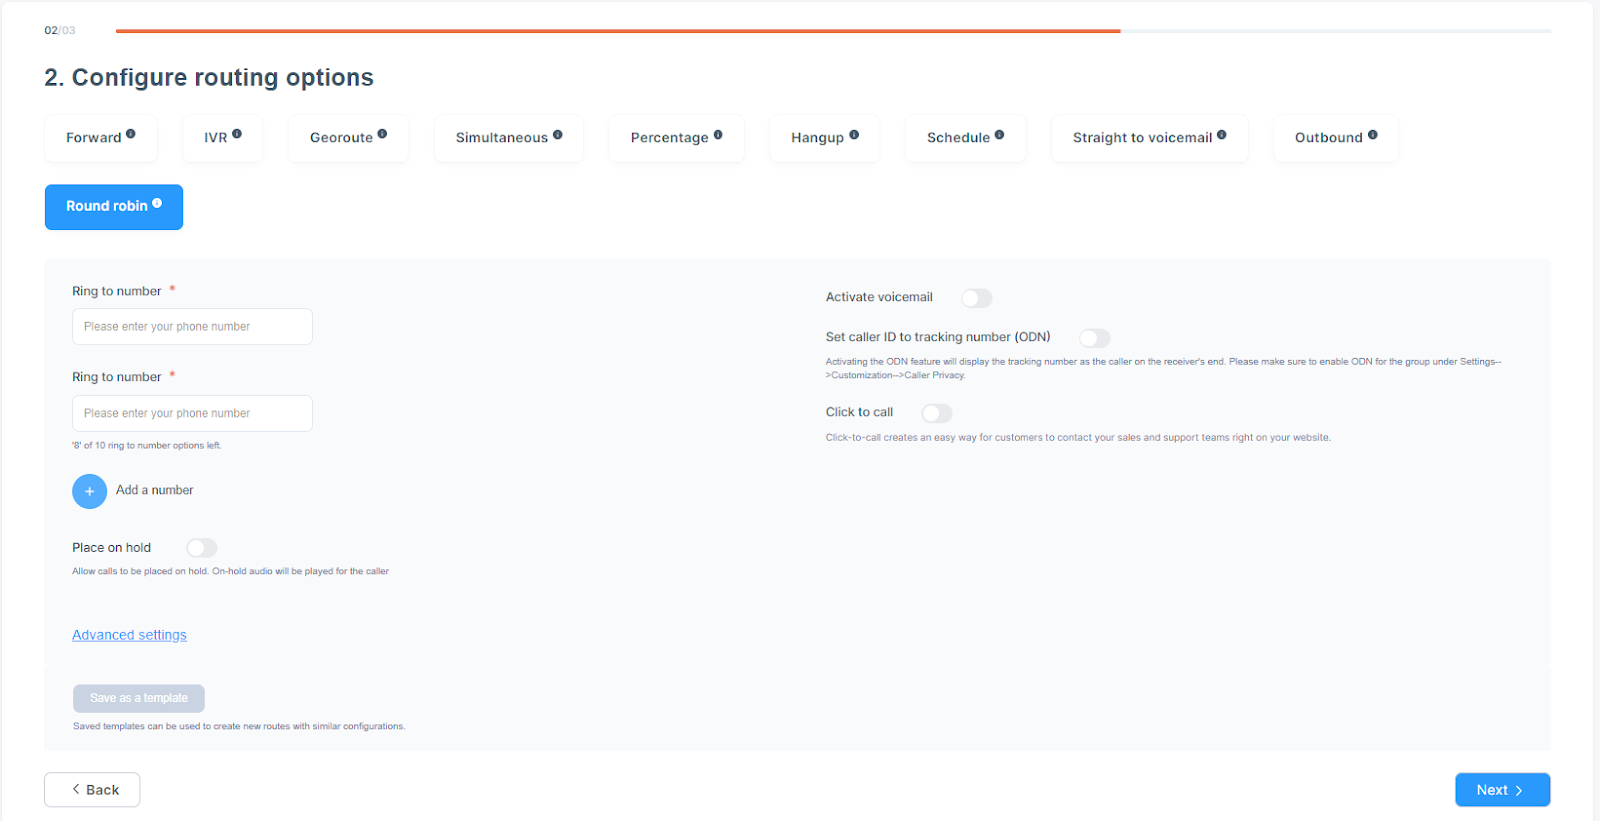
Round Robin
Round robin allows the call to be forwarded to different agents in a specific order depending upon which agent answered the first call. E.g., If there are four agents and 1st call is answered by Agent 2, then the 2nd call will ring Agent 3 first and follow the order.
Ring to Phone Number: The ring to phone number is the phone number that Convirza will forward all your calling traffic. The customer's call placed on the tracking number will be routed to this number.
Add Overflow Number: The add overflow number is a secondary ring-to number. It is categorized as a hunting option.
There are three hunting types available for all Route types and can be used on all the routing options (except for Send directly to Voicemail, Outbound, and Hangup)
- Overflow
When a call is not answered after a specified number of rings, the call can be redirected to another ring-to number. In this case, only one ring-to number is added, and the user must always specify the number of rings before a call is sent to the following overflow number.
- Rollover
Like Overflow, the user can add multiple overflow ring-to numbers for a Tracking Number. When the first ring-to is not answered, the call is redirected to a second ring-to number, and if the second ring-to number is not answered, the call is redirected to a third ring-to number. The calls are sent to the following rollover number in a defined sequence. The user must specify the number of rings for every ring-to number to send the call to the following rollover number. The user can add a maximum of 12 overflow ring-to numbers.
- Simultaneous
The system allows the user to set the call to ring all the overflow numbers simultaneously when the customers should not miss any calls and the caller should not wait for the long rollover sequence. This reduces the callers’ waiting time and ensures the correct distribution of calls to the agents.
A Simultaneous Ring checkbox should be selected to configure the simultaneous hunt option.
By default, the number of rings for Simultaneous hunting will be specified in the system. If voicemail is configured, voicemail rings will override the default number of rings.
We have introduced new functionality of hunting with IVR, where the hunt target must press 1 after a short whisper to accept the call.
This guarantees that a live person is answering the call and the conference only happens after receiving the DTMF entry 1 from one of the hunted parties.
Activate Voicemail: The voicemail toggle will always be available for all routing options except Outbound and Hangup. When the user has it toggled on for any ring-to number, the call will be sent to voicemail if the agent does not answer the call within the specified number of rings. The number of rings can be specified here, and the voicemail greeting can also be selected here. The user can listen to all the voicemails from Reports just like they listen to other calls. The conversation recording is always enabled for the Tracking Numbers configured for Voicemail.
Set Caller ID: The user sets the caller id that will be displayed to the customer when the agent makes the outbound call.
The following 2 options are available in the drop-down list:
- Caller Id: The exact caller ID of the customer to whom the outbound call is to be made.
- Tracking Number ODN: This is an original dial number displayed to the customer when the agent makes the outbound call.
Play on hold: This keypress will put the call on hold and off hold while on-hold audio will be played for the caller, which can be selected here.
Click to call: You can activate or inactivate the ‘Click to call’ functionality here. Click-to-call creates an easy way for customers to contact your sales and support teams from your website. The settings can be configured under Customization→ Click to call.
C) Advanced Settings

Conversation Value (optional): Conversation value is a numerical value that depicts the monetary expenditure on the campaign and whether it is yielding profit or loss. It can be added to each call processed in that flow. The Conversation Value appears in reports and is sent to Google Analytics if you enable the Google Analytics integration.
Repeat Interval: Repeat interval is by default of 72 hours. It allows us to set the time frame for repeat calls shown in the reports. The maximum allowable interval is 8760 hours (1 year). For example, If a caller makes a call for the first time, known as a unique call, and makes another call/s within 72 hours, then that time frame is termed a repeat interval. After these 72 hours, the same caller will be treated as a new caller.
Pre-Call Webhook: The details of the call can be sent to another application desired by the customer using webhooks. When the call is connected, a pre-call webhook will be triggered, and real-time information from the app will be provided to other applications.
To configure the webhook, use the following steps:
- Select “Tracking Number” from the left-hand menu.
- Go to the Tracking Numbers Advanced Settings Section.
- Edit an Existing Tracking Number or create a new Tracking Number.
- Select the Pre-call Webhook toggle from the Advanced Tracking Number section.
- A drop-down list is presented. Any option from the list can be selected.
- If the drop-down list is unused, you can jump onto the webhook settings page by clicking the create button.
- The Webhook Details section will open. Fill information in the following fields:
- Active - Active toggle can be used to either set the webhook to active by toggling it to 'Yes' or deactivate it by selecting 'No'.
- Webhook Name - Name of the webhook which will be seen in the Webhook Logs report.
- Description - Some description that will help to recognize the purpose of the webhook.
- Endpoint URL - The URL to which the CAI data will be posted.
- Method -
- Post
- Put
- Format
- JSON
- XML
- Legacy XML
- Form URL Encoded
- If Post-call webhook is selected, then the following options are available
- Include DNI Logs
- Include insights Scores
- Include Data Append
- Include IVR key presses
Record conversation: Right from when the call is connected until the conversation is terminated, the entire conversation/voicemail/IVR/anything else that happened on the call is recorded. It is on by default. To avoid recording any conversations, simply uncheck the box. Calls must be recorded to analyze them using Convirza’s Conversation Analytics® service.
Play Disclaimer: A disclaimer is used to inform the caller about the conversation being recorded. The recording disclaimer will play before any voice prompt by default unless it is turned off for conversation recording. The default value will be set to never. The settings can be changed to play after any voice prompts or never.
Note: In many regions, it is required to play a disclaimer that the call is recorded.
Voice Prompt (optional): The voice prompt will play a custom Voice Prompt to the callers. The speech-to-text box can be used, or a recorded voice prompt can be uploaded.
Example - Your call has been connected. You are going to speak with the representative of (name of client company)
Play whisper message before connecting (optional): A whisper message is a custom voice prompt for the agent that will play after the call has been placed by the customer. Users can use the speech-to-text box or upload their own Whisper Message.
Example: Customer calling through ad source Google: Organic.
Play whisper message for first-time caller: This message will play only for calls from first-time callers. Users can use the speech-to-text box or upload their whisper message in this section. This will be only played for the agents for unique calls.
Example: The call from a new customer.
Answer Confirmation: To use this functionality, ‘Play whisper message before connecting’ should be enabled. After the whisper is played for the agent, they can choose from the following options.
Press 1 to answer.
Press 2 to end the call
Send to Voicemail (if enabled).
Custom Sources (optional): Custom sources provide additional information about the advertisement. The user can set 5 custom sources in the application.
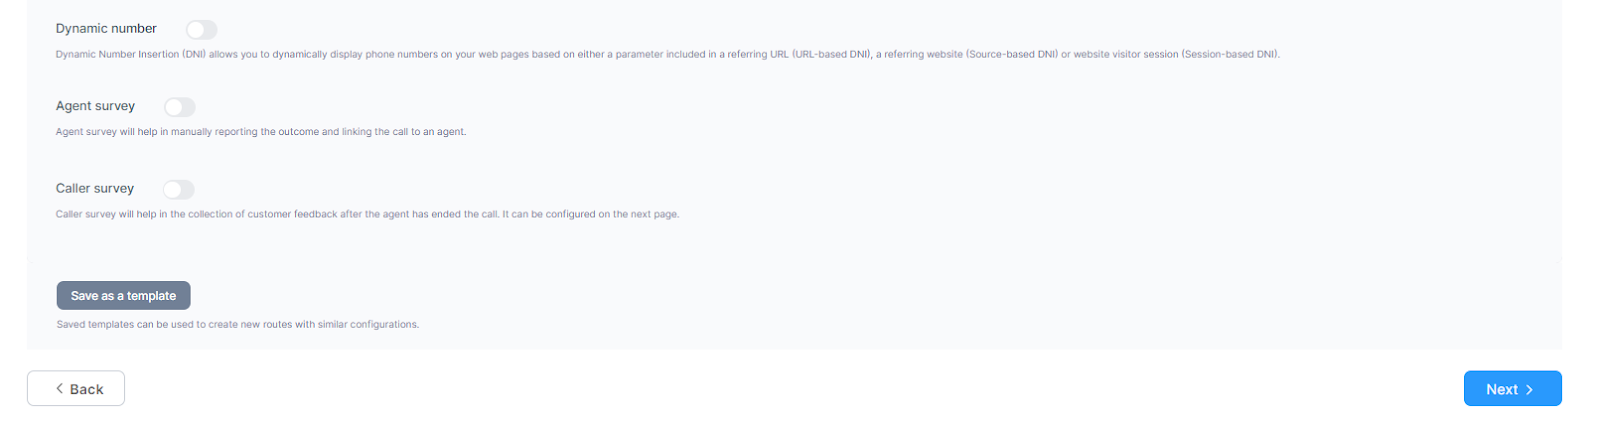
Dynamic Number (optional): DNI should be checked if you would like this number to be used with DNI. For more information on DNI, please review the DNI section.
- Host Domain: The host Domain is the website or web page on which the dynamically inserted tracking number will be displayed.
- Referring Website: The site or search engine on which a customer has searched for your advertisement. It is the source of your traffic.
- DNI Type is the type of path used to display the tracking number
1. Session-based DNI: Session-based DNI tracks PPC ads throughout the browser session.
2. URL-based DNI: URL-based DNI displays specific numbers for email and other traffic with unique URL parameters.
3. Source-based DNI: Source-based DNI lets you know which online traffic sources result in phone calls. - HTML Class: You can name the HTML class to be used in URL-based number insertion of the tracking number. If, and only if, you are using URL-based DNI, you must use lmc_track as your HTML class.
- Keyword helps you to get the number swapped if the keyword is present in the URL for the session and Source type DNI.
For example, if TestDNI: ABC is added as a keyword, it will only swap the number for https://www.convirza.com/?TestDNI=ABC - An identifier is a string added under DNI settings. The Identifier can contain alphabets and/or numbers. Whichever identifier you add under DNI settings will be replaced by the tracking number on the website. In the above example, the places on the website where 1234567890 will appear will be replaced with the tracking number.
- The number format is the format of the number that must be displayed on the website.
- Custom Parameter: DNI can capture your own or a third-party platform's custom collection of URL parameters or cookie data associated with a web visitor.
- Once your setup is complete, save your number and use the left-hand menu to navigate to Settings -> Customization -> DNI. On this page, you will see any DNI numbers set up within the group you are currently working in.
Surveys: The agent and Caller surveys are used as feedback after the call for the agent and caller, respectively. Agent Survey helps the users to find call outcomes, and link calls with the agent who handled them. Similarly, the Caller Survey helps the users to find information about the caller and link the calls to the caller. Agent Survey and Caller Survey will report the quick result of calls even when Conversation Analytics® is not part of a client’s subscription.
Agent and caller surveys can be created under Advanced Settings of a particular tracking number, or you can use the survey templates saved under Group Settings→Surveys.
Once all the settings are added, you can save the tracking number or save it as a template.
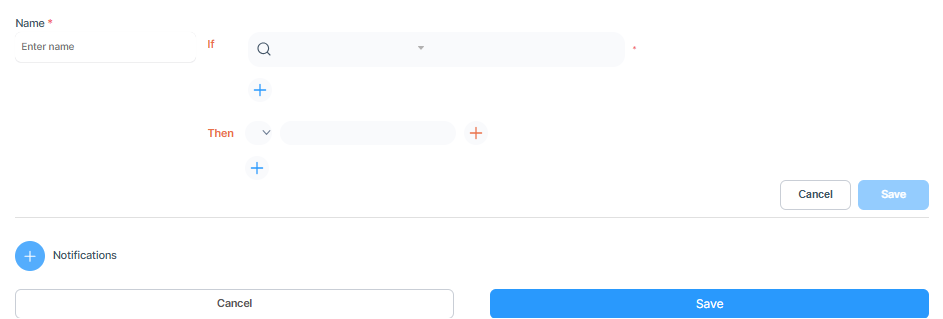
Click on next to add the Ultimate AI Actions. You can add the Ultimate AI Actions for a particular tracking number or choose the Ultimate AI Actions inherited from the Group Settings→ Ultimate AI Actions. Click here for more information.
Click on next to save all the settings for the tracking number, and the tracking number gets provisioned. Please make a test call before reaching out to the customers.
To edit the tracking number, click anywhere on the row for a particular tracking number in the grid, and it will open the settings for a particular tracking number.

You get the option Ultimate AI Action to add/edit/delete Ultimate AI Action under the tracking number settings.
You can Edit/Delete the provisioned number.