The Groups & Users page allows you to manage your Groups and Users, including their permissions, by adding, deleting, or editing them.
The Groups & Users page is accessible only to users with admin access. You can switch between Subgroups and Users using the toggle at the page's top left.
Groups can be created at three levels, with unlimited groups addable at the second and third levels. The first level represents the billing-level group.
There are four types of users: Admin, Standard, Read-Only, and Identified-Only users. Scorers can only be added on the backend and are not available in the UI.
You will find the orange "Filters" button located at the top left of the page. Use this button to specify the criteria for the data you want to retrieve. For example, you can filter data by a specific tracking number, caller ID, and more. On the right side of the page, there is a "Save Filters" button, which allows you to save your selected filters, so you don't have to choose them from scratch each time. Just to the left of this button is the "Reset to Default" option.
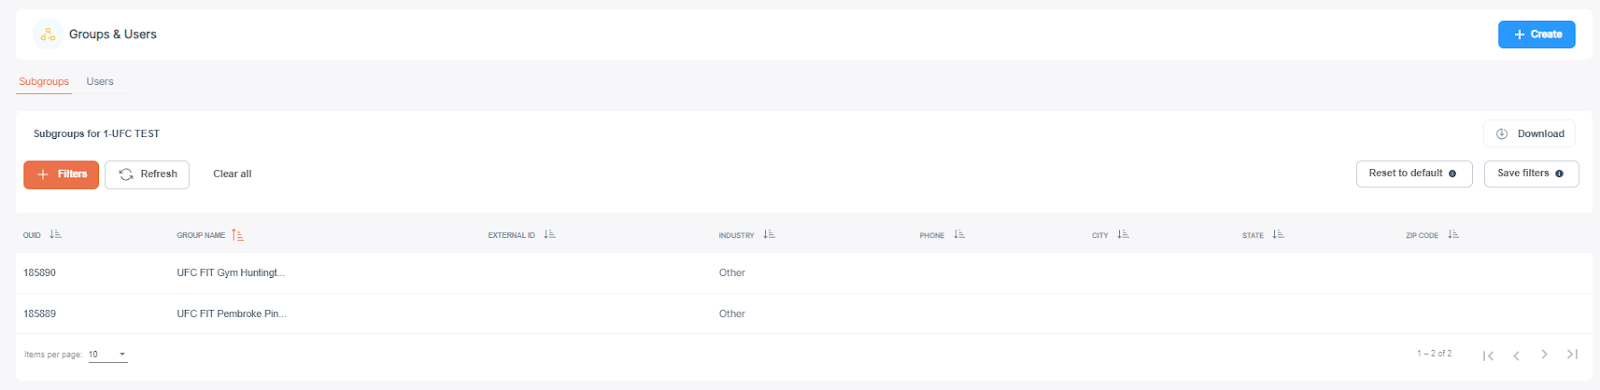
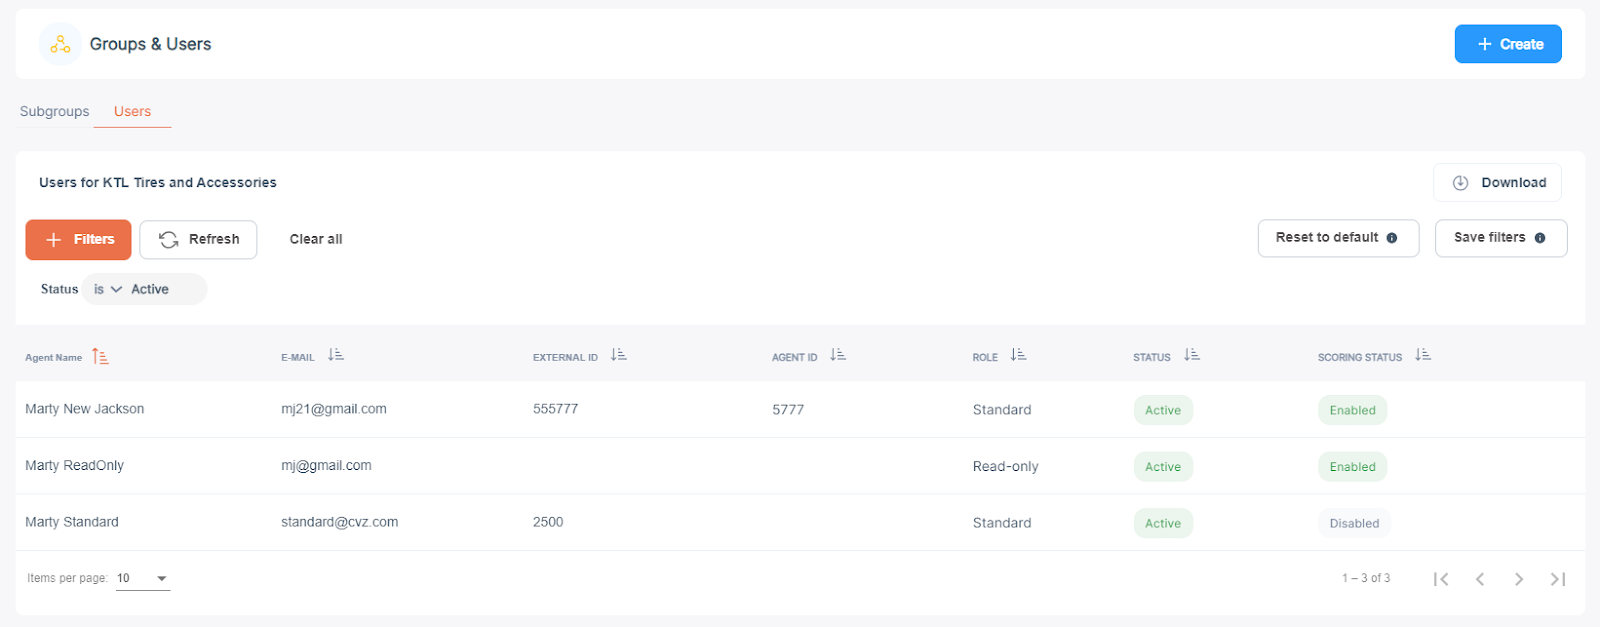
The Subgroups and User tables both provide the following options:
- The Download button allows you to export the data in the table as a CSV file.
- You can sort the data by clicking on the column header.
- In the bottom left corner, you will find the Items per Page dropdown, which lets you choose how many results to display at once: 10, 25, or 50. On the bottom right of the page, you can navigate through the pages using the arrows to go to the next page, last page, or previous page.
- To add new Groups and Users, use the **Create** button located in the top right corner of the page.
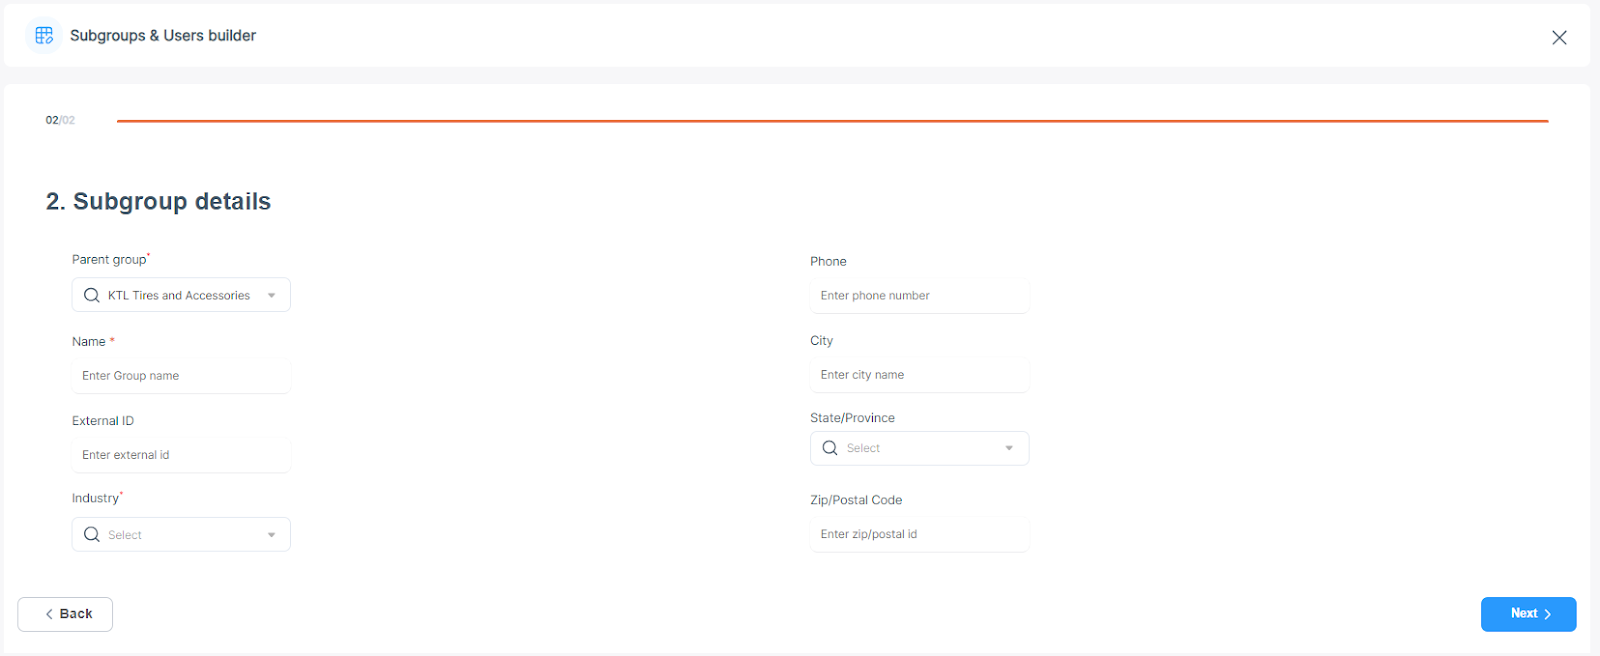
Create Group/User flow:
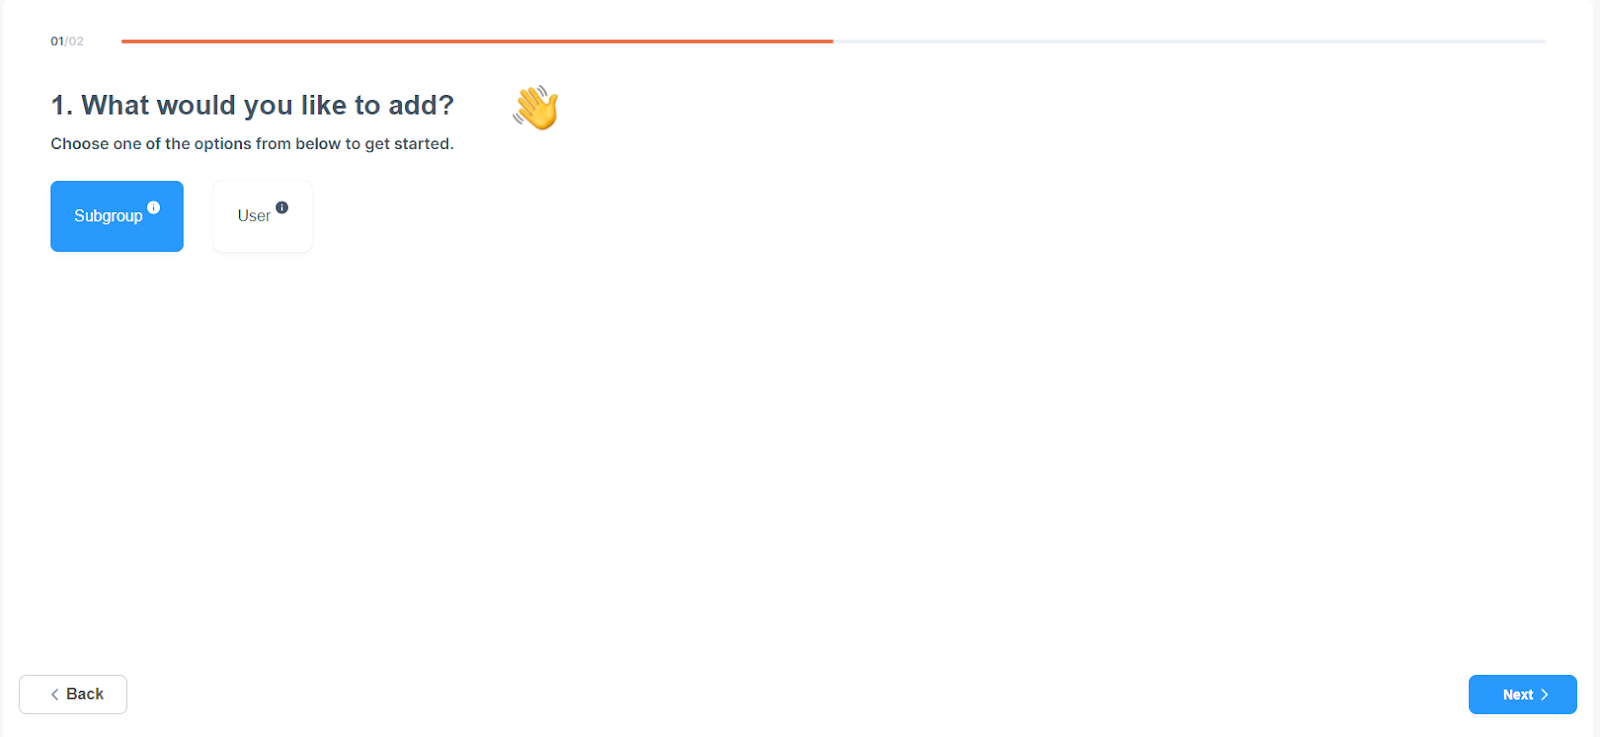
- Click the "Next" button to proceed to the following screen.
- If you leave a mandatory field empty, an error message will be displayed.
Edit User & Group:
After selecting a Group, you can view Subgroups and Users within that Group.
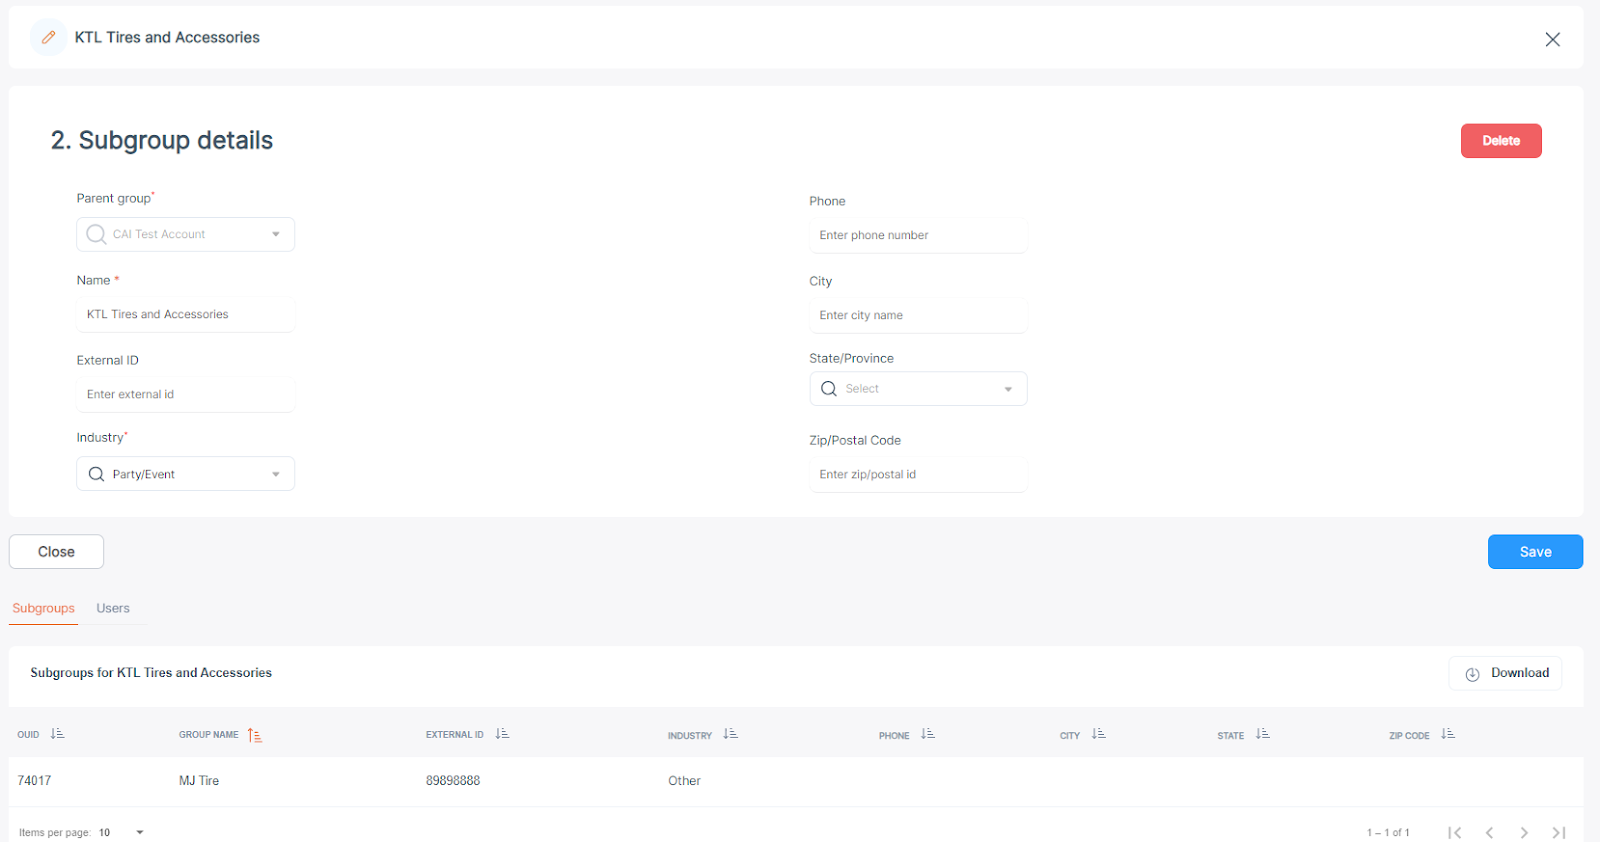

- To edit a Group or User, click anywhere on the row corresponding to the group or user you wish to modify. You can move or delete users, and a confirmation message will appear before finalizing these actions. If you click by mistake, you can select "Cancel" to revert the action.
- You have the option to add multiple Nicknames for each user.
- When moving a user to another group, remember to check and update their permissions accordingly. If you would like to move the user's calls to the new group as well, make sure to check the option for transferring the calls.
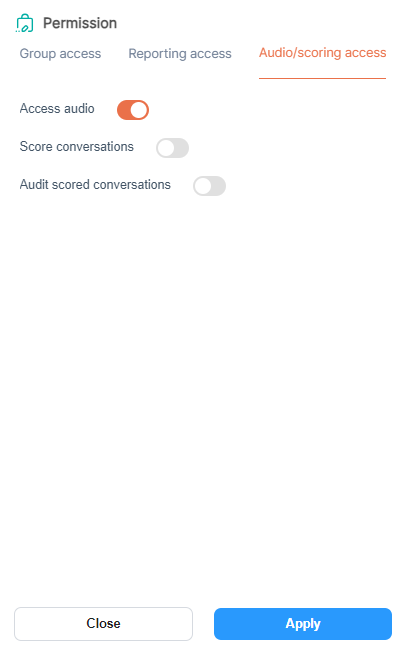
- You can also update user permissions and passwords from this section. Permissions for Group access, Reporting, and Audio/Scoring can be edited here. After making any changes, be sure to click the "Save" button, or the "Apply" button for Audio/Scoring access, to save your updates.


- Agent ID allows the unique Agent ID to be assigned to the user
- Agent Ring is a phone number that is assigned to the user.
- Enable scoring option allows the conversations to be assigned to this user.
- The roaming Agent option allows the agent to be assigned to conversations that belong to any group in their selected groups' permissions.
For more information about users and their permissions, please visit Users and User permissions